So this has to be the most flavorful recipe for pork chops that I have ever encountered! Not only do they manage to be stock full of flavor, but this recipe still allows for the pork to come out juicy and not all dried out. Since I am trying to bring different recipes into the home as of late, I decided to drift from chicken for a little bit and try my hand at some pork chops! Granted we had planned to grill them at first, but come to find out the grills downstairs are all busted and not in working order! But hey, at least it allowed me to get creative and come up with a solution!
What You’ll Need:
4 (8 ounce) pork chops, bone in or out
I used bone out!
16 ounces baby red potatoes, halved
16 ounces green beans, trimmed
I opted out of the green beans altogether, we’re not much of a bean household
2 tbsp olive oil
1 (1 ounce) package Ranch Seasoning and Salad Dressing Mix
3 cloves garlic, minced
Kosher salt and freshly ground black pepper to taste
2 tbsp chopped fresh parsley leaves
Directions:
Preheat oven to 400 degrees F. Lightly oil baking sheet/dish or coat with nonstick spray.
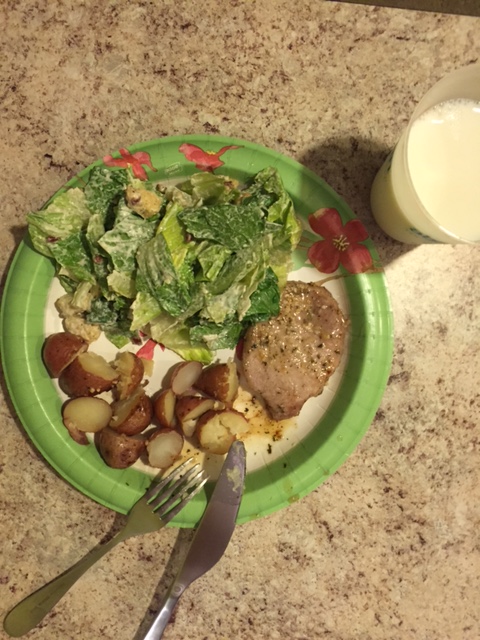
Place pork chops, potatoes and green beans in a single layer onto the prepared baking sheet. Drizzle with olive oil and sprinkle with Ranch Seasoning and garlic; season with salt and pepper, to taste.
Place into oven and roast until the pork is completely cooked through, if you happen to have a meat thermometer you will want it at 140 degrees F, about 20-22 minutes. Then broil for 2-3 minutes, or until caramelized and slightly charred.
This was my first time broiling anything btw! It was exciting 🙂
Serve immediately, garnish with the parsley, if desired.
Since I opted out of serving with green beans, because gross, I did a side Caesar Salad instead. The entire meal turned out super delicious and it was just the right amount per serving so that you don’t over indulge! We’re all about portioning over here as of late, well at least I am! I’m not dealing with those pesky leftovers any more! No WAY! Check out the link >>here<< for the original recipe from Damn Delicious! Happy cooking!
I don’t know about you, but there are some days where I just feel like I NEVER get anything accomplished in my day! Other’s I get all jittery and just jump right into my to-do list and feel like I can conquer everything on my list! Well what makes these days so different from one another? How can you be more productive in your every day life? I’ve compile this nifty list to answer these questions!
Evaluate you priorities. This is very important to staying productive, take about 10 minutes or so to list out your to-do list and examine who or what is important to you on that list. Keep your list on hand so you can view it frequently and stay on track, always make sure the big things come FIRST. The amount of time you spend on something should be relative to how important it is in your life. Life is short and every second is precious, don’t waste your time on the little things that don’t matter.
Set a timer or time frames and stick to them. Setting a time frame can be the best way to keep yourself motivated as well as productive. For instance, I know that my workouts take up thirty minutes of my day so I always start them at 3:30 in the afternoon knowing I’ll be finished by 4:00 pm. Plan out your time and stick to it! Limiting your time on seemingly endless tasks like emails and Facebook helps a lot too. When you tell yourself that you only have a set amount a time to accomplish a task, it is a better motivator to get it done and not to procrastinate!
Set concrete goals and write them down. When you sit and actually write out clear and specific goals, it is more beneficial to staying on track to reach those goals in a more timely fashion. Set long-term and short-term goals, then break down those goals into manageable day-to-day tasks. All goals that you set for yourself should also have an end date! I have a chart I utilize with my goals on paper and have them posted in our bedroom, so I am reminded each day of what my ultimate goal is that I am trying to achieve.
Use daily checklists. For some reason I just LOVE the feeling of crossing off an item on my to-do list. A daily to-do list keeps you focused in spite of all of your daily distractions. Do not go overboard with your to-do list though, make sure that you can actually be accountable to complete everything on your daily list. I found a little notepad at Staples that I’ve found to be really useful!
Wake up early. This will be everyone’s LEAST favorite item on this hacks list, because I can definitely say that I was never a morning person! But it’s gotten to the point now where I really physically have no idea how to sleep in! Even on the weekends we still wake up automatically around 7 am, granted sometimes we’ll force ourselves to go back to sleep, but we’re still up and doing something by 8 am. Look at it this way, just consider how much your life could change a year from now if you just wake up thirty minutes earlier? You can use that extra thirty minutes working towards your most important long-term goals. Every study that I have ever read confirms that you are more productive in first thing in the morning, use that peace and quiet to complete your most important tasks and you will never regret missing that extra sleep.
Turn off electronics. This might seem to be an obvious item that goes hand-in-hand with maintaining the ultimate productivity levels. Now, I set a time frame and organize my social media posts to be automatically posted using Hoot Suite so I don’t get distracted trolling through my newsfeed on a daily basis. Some businesses require social media interaction, which is completely FINE! But in order to continue on with your daily list, you need to cut out your distractions. Utilize apps like Hoot Suite and set up your posts as a part of your items on your to-do-list, then once that is set get off your phone! When you’re writing your blog posts, or emails, or papers for school, do NOT play a bunch of Netflix shows in the background. You cannot do your best work when you are accidentally typing out an episode of Archer…trust me, that does NOT make for a good thesis paper when you type out “LAAANNNNNAAAA.” It might make for a good laugh with your professor, but only for five minutes before you fail completely.
Make it interesting/fun. This one might sound weird, but it really works for me when it comes to doing something that I completely dread doing. Laundry for instance is my nemesis, I absolutely LOATHE folding laundry, so to get me through it I’ll try making it into a game. I usually will set a timer for myself to make it a challenge, with each week the time gets shorter and shorter. It absolutely sucks if I go over my time limit since I feel like I’ve lost at my own game. I also use a points system for socks, I’ll match the socks and try to toss them into the drawer. For everyone I make I get a point, and for every one I miss I lose a point. Call me a dork, but hey at least it gets done this way!
Change your mood. Your mood completely reflects the outcome of your day. Some days it’s understandable not to be in the best mood possible, but once you change your attitude your entire day can be turned around! Be optimistic and think highly of yourself and be happy! Your productivity is heightened exponentially when you have the ability to change your outlook. You are more likely to accomplish your goals more quickly, than if you view everything with a negative attitude! I utilize personal development (audio books/YouTube/books) to help me stay positive and stay focused to achieve my goals!
Do not half-ass multiple things, whole ass one thing. Multi-tasking might sound like a good idea, but the reality of it is that it’s not at all. Focus your time and energy on one thing at a time, it makes for a better outcome with what you are working on. When you accomplish one thing from start to finish, you are reaped with a better reward of self-accomplishment and are more inclined to move onto the next item with a better attitude. On top of that, you are less likely to make mistakes when you focus on one thing at a time instead of four. You will be more satisfied completing one item at a time and doing it correctly!
Take a break! You cannot be expected to work productively constantly if you burnout and don’t take a break for yourself just to breathe. Taking a quick 3-5 minute break every 90 minutes or so is sure to help your brain refocus. Stand up, stretch, go get some water, a breath of fresh air. then sit back down and get back into it. Do not force yourself to power through an entire day of work without taking a few minutes to yourself to regroup! You will find that you are much more productive and on task when you sit back down after that break.
So go and make your days more productive! Stay positive and remember to breathe, we all have A LOT to get done in day!
This recipe title may seem deceiving, but trust me it is NOT in the least….it’s actual cookie dough..with no egg that you can just devour. Talk about dangerous! This wonderful recipe I found – of course – through Pinterest. Then of course the credit goes to The Girl Who Ate Everything, for introducing me to this delicious delicacy, which in some instances I slightly modified to my own personal liking.
The best part about this dish is that there’s really nothing to it at all, it’s simple, to the point, and really curbs your sweet tooth!
Ingredients:
1 (8 oz) cream cheese package, softened
1/2 cup butter, slightly softened melted
1 cup creamy crunchy peanut butter
2 cups powdered sugar
3 tbsp brown sugar
1/4 cup all-purpose flour
1 tsp vanilla extract
2 1/2 1 cup rolled oats, old fashioned or quick
2/3 cup M&M’s (add more or less according to preference)
1 cup semi-sweet chocolate chips
Directions:
With a hand mixer or stand mixer, beat the cream cheese, butter, and peanut butter until smooth.
I do not own a mixer of any kind *sigh* so this was all in the wrists for me with a whisk, which is much harder- I would assume- when using crunchy peanut butter. I LOVE crunchy peanut butter though, you can also substitute for almond butter if you are wanting a somewhat healthier alternative. It will still taste AMAZING!
Also, since I do not have a mixer I left the cream cheese out to soften for about 15 minutes and opted to melt the butter so it was easier to mix together by hand.
Next, add in the powdered sugar, brown sugar, flour, and vanilla extract.
Using the paddle attachment on your mixer, or just a wooden spoon (or a spatula in my case), mix in the oats.
Since I used crunchy peanut butter with that added texture already I opted to lower the amount of oats I put into the dip, it really thickens up once added. I do like the thickness more than a smoother dip, this is all about preference here! Plus, you are putting it in the fridge afterwards, it will firm up!
Add the M&M’s and chocolate chips.
Store in the refrigerator until serving.
This is where it gets fun! The dip goes well with almost anything! I, like The Girl Who Ate Everything, opted for a spoonful. But It’s a great dip for graham crackers, salted pretzels, and all kinds of fruits.
My Thoughts:
This dish was just mind-blowingly (I don’t think that’s a word, but I’m making it one) awesome! I am very glad that I switched it up a bit, I have tried it the original way and then modified it more because in all honesty it became too sweet for me. I am very partial to sweets, so I added the salty and sweet to balance it out more to where I could eat it more easily. But even so, I do not think there is a wrong way to make this dish!
All in all it was prepped and cooked within about 15 minutes, I didn’t even have it in the fridge for 5 minutes before I sat eating it out of the container! I definitely plan on adding it to the list for dishes I am making for the upcoming Halloween Party!
*Correction, I now HAVE a hand mixer! Of course now I have two, since it was on the registry but not everyone checked it I guess! Works for me 🙂 *
*Yay for reposts!! Check out the tutorial below that we utilized for our head table at the wedding!!*
Alright ladies and gents! Here it is! So apart from Halloween being Friday, Shane was on base all weekend so I was left at home to my lonesome (sorta, Clay was home too), but I don’t take my time to myself for granted! I have been- for the past two weeks now- just stock piling on the materials to get a few wedding decorations in order and all planned out.
My top items, get the banner done and then the centerpieces underway. Don’t worry, I will post the DIY for the centerpieces as well this week. Also, how I am keeping all of these mini projects organized to equal the big picture in June!
Of course the majority of my ideas stem from Pinterest, my savior. Well this little tutorial I followed came from rusticweddingchic.com , where there are seriously so many DIY I have to put on my restraints before I get sucked into the site. If you are a DIY bride like myself, check it out for inspiration!
Materials:
(And these vary depending on preferences)
15 ft. burlap (Hobby Lobby – $7.99)
I chose an already banner sized roll of burlap so as to reuse for wrapping the cutlery and centerpieces (coming soon), plus much easier than a huge roll in my own opinion
Acrylic white paint (Hobby Lobby – $4.99)
You can choose other colors, depending on your style and preferences, creativity is encouraged!
X-ACTO knife
I just used a razor blade that I had at home, but for safety and precision go for the X-ACTO knife
Scissors
Paint brush
See notes below
Printer and printer paper for letters
Twine (12 ft. min)
Wax paper
Directions:
Type up your Mr & Mrs text on Word, choose any font and any sizes you would like, of course making it large enough to encompass enough room on the banner. Print it out.
I cannot for the life of me remember the font I chose, I browsed for at least 40 minutes before deciding on this font. I know it is just a font offered through Word, nothing especially downloaded. I think the size ended up being around 300.
Use your X-ACTO knife to cut out the letters so as to create your stencils.
Shane actually did this for me, he used to do window tinting and has a much steadier hand than I do, plus he used a plain razor blade. It was sweet really, he did it while I was at work!
Next, line up your stencil in the burlap to get a gander at how much space you want on either side of the letters.
This is where the burlap banner roll came in handy, it was already the size I needed, I didn’t need to do any ironing from folds, and just had to then cut with the scissors.
Then, cut your burlap into six squares, just overlapping the squares so as to have the same sizes.
Sorry I’m a little blurry !
Once you have your squares you can now lay your stencil down to paint.
I was in our kitchen, and of course I did not want paint getting onto our table, so I put wax paper underneath the burlap. I chose wax paper because after each square I could just wipe off the paint and lay down the next piece without wasting a ton of paper in the process.
Paint each letter.
I didn’t use a paint brush, I used a sponge, it is hard to paint burlap without snagging the material. I dabbed instead used the painting sponges, same effect, just less hassle.
Once complete, let air dry for at least 15-20 minutes.
Lastly you will want to run your twine through your banner.
I have not done this step yet as I ran out of twine for the Halloween party, I will post an update once it has been completed!
*On a few side notes, this is a very easy project and literally took me maybe twenty minutes with all the supplies already on hand. It turns out AWESOME and I was skeptical before it had fully dried that you wouldn’t be able to see it but you definitely can!*
You can also find this tutorial as well as many others by clicking the icon below! My first link-up party! Let’s see how it goes!
Tip: After cutting the burlap you will notice it begins to unravel, pull some of the strands off the sides so it won’t continue to unravel on it’s own. It gives it a more worn and frayed look anyways. See here for further details! If you get the roll instead of the yards it will eliminate the burlap from unraveling on the top and bottom as it is already sewn! 🙂
Another throwback recipe!! With the hubby not being able to tolerate spicy foods I haven’t had a chance to make this one a second time around! This one is definitely worth a try for your taste buds, they will go crazy!
I got this recipe through Pinterest, posted by Simply Gloria. Where I also did the recipe step-by-step and she had the most helpful tips, photos and tricks listed with the recipe as well! Before trying out this meal, I had NO clue how to shred chicken, or even that you could boil chicken. MIND BLOWN. On top of that, the sauce for this recipe I have also incorporated it into countless on-the-spot dinners now at home!
Ingredients:
6 8 lasagna pasta, drained and cooked
2 chicken breasts, cooked and shredded
1 cup buffalo sauce, divided
1 (8 oz) cream cheese package, divided
1 cup heavy whipping cream
2 tbsp butter
2 cups mozzarella, shredded
Directions:
Add 6 pieces of lasagna pasta to a large pot of boiling water.
I used 8 pieces. No changes have to be made to the measurements.
Cook pasta for 4-5 minutes. It will finish cooking in the oven.
I had to cook mine for about 7-8, I live in a rental and my oven burners are uneven when cooking.
While the pasta is cooking start on the white cream sauce and chicken. (See Notes below)
Drain pasta in strainer and lay pasta onto paper towels to dry off excess water.
This was trial and error, I cooked the extra pieces for this reason, I had a one lasagna pastas tear upon removal from the water that could not be used to roll. Hence the seven rolls pictured above, not too shabby.
For the white cream sauce – heat a sauce pan (medium to large) at medium heat, add the butter, 4 oz (or half) of the cream cheese, and the heavy whipping cream. Whisk it all together while it is heating up. Sprinkle in some garlic and onion powder seasoned salt. You can also add salt and pepper to taste. Set aside once it has thickened.
In a large mixing bowl, combine the shredded chicken, the remaining 4 oz of cream cheese, mozzarella, and buffalo sauce. Stir and set aside.
Put a spoonful of the white cream sauce on each pasta. Next, spread the chicken mixture evenly on top of the sauce. (Be sure not to overload it, otherwise it won’t roll up) Sprinkle with some mozzarella, then roll up.
Have a baking dish off to the side with some white cream sauce on the bottom. Set each lasagna roll onto the sauce.
Pour the remaining cream sauce on the roll-ups. Sprinkle on more mozzarella and drizzle some extra buffalo sauce.
Seriously just drizzle, as you can see above I overloaded mine, and the sauce overpowered the dish. It was still delicious, but it was just too much buffalo sauce.
Preheat the oven to 350 degrees, bake for about 25-30 minutes. Then allow it to rest and cool for about 10 minutes after pulling it out of the oven.
Notes:
How to Shred Chicken Breasts: Put the 2 boneless chicken breasts into a pot of water at about medium heat. (No need to rinse the chicken) Cover with lid and bring to a boil. Once it has come to a boil, remove from heat but leave the lid on and let the chicken continue to cook for roughly 20 minutes. Then, take out the chicken and shred with two forks.
My Thoughts:
This dish was superb, besides the fact that my drizzling techniques need some definite work! I will most certainly be attempting this one again, and since I have been using this same white cream sauce on many dishes, I would add much more to this recipe than what is listed. In my attempt I did not have enough to fill the bottom of the baking dish with leftovers to pour over the top. I also did not have onion powder on hand, so I opted for seasoned salt instead.
You also can take it one step at a time, I cooked all three separate items at once to cut back on time, and also because I prefer multitasking. I also found out that the noodles would not roll up as easily if left sitting for too long, and ended up having to put them back in the pot for a few extra minutes once the chicken was finally ready to be shredded.
Overall, this recipe does take a little over an hour to make, what with prep time then cooking/cooling times. It was a weekend dinner for me when I wasn’t too rushed to complete it. But I would definitely recommend it! Check out more recipes by Simply Gloria!
As a newlywed you get asked the question “So, when are you having kids?” Like constantly. Check out the most annoying newlywed questions >>here<<. So to be perfectly honest right now kids are just not on my “to-do” list if you will, and it’s not because I’m “selfish” as so many people automatically assume that we are when we answer the question, it’s because children terrify the living shit out of me.
That might seem silly and weird to a lot of people, but it’s completely true. I’m a perfectionist, I like order, I like clean, I like my schedule and my hobbies, I love taking a weekend away…all things that make me sound selfish. But to me the idea of children leads to the constant unknown, messes EVERYWHERE and ALL THE TIME, nothing is ever in order, a schedule can be made but often broken, hobbies are set aside until they lose fruition, and no weekend is ever really a break anymore.
Granted, I do not have children so for those of you who do and still accomplish a steady life with order and still manage weekends away, well you are very few and far between and you are someone that everyone else admires. But not only do children terrify me in the aspect of just chaos in the household, it’s outside of the house that is out of my control that would tear me a part as a parent.
As a child I was tormented constantly, I went through a “chubby” stage if you will, as do a lot of other kids, but I was also the new girl in a new school from Minnesota all the way down to Florida. I was the girl who wore socks with my sandals because in Minnesota it’s always too cold not to wear socks. I was the girl who had outdated clothing from Old Navy and the “funny” northern accent. I was the pale girl with too dark and too short hair with a Columbia backpack normally used for hiking, while the other kids had decorative Jansport backpacks. I was the tomboy who took interests in PE over sitting playing hand games with the rest of the other girls.
Children terrify me because they are all cruel in their own ways, and while parents will never admit that their own child is a bully, it still happens to this day. It’s a never ending cycle of mean cat-calls and now with social media it’s just opening a million other doors to getting unwanted exposure and attention. Growing up being bullied is something I would never wish upon any child, my own or someone else’s.
Plus the idea of child birth completely destroys my confidence levels, I mean seriously I feel like that has to be the worst experience ever. I have a slight aversion to pain and I really don’t want to go through it, it just sounds all kinds of awful. So my answer to your annoying questions about children is just “no.” If they are in our future, then that’s just great, but as of right now we’re enjoying being married and enjoying the not-so-peace-and-quiet that is our life. Trust me when I say this, we’ve got enough going on right now without children.
Do you ever see those fitness pages on Facebook or Instagram? You just can’t help but wonder how exactly these people are all staying so on track and are so focused, to obtain the results they do in their health and fitness journey. You do so much research, you try to be as consistent as you POSSIBLY can be when it comes to working out, but you lose your stride after you plateau, or stop seeing changes in your physique, or life just gets in the way…
Trust me, we have ALL been there before, and while I am still working towards my fitness goals, I will not be deterred from what is rightfully mine! So, to inspire others that you ARE NOT ALONE, I have created this top 10 list of motivational hacks that have really come to use for me in the past three months post wedding. But it all starts with the FIRST step, which is your desire to WANT to change. It’s all true when they say it’s a lifestyle change, you have to WANT to change your life. These hacks will push you along the way after that decision has been made, we all need the push sometimes, so let’s get to it!
Exercise even if you are short on time. Even if you only have 15 minutes, exercise anyways! A short gym routine or at-home circuit is honestly better than nothing. Pinterest has thousands of quick at-home circuits that you can utilize within that short amount of time, or you can even find them on Youtube! You will feel ten times better after that short workout than you would have if you just brushed it off…again.
Invest in a fitness tracker, such as FitBit. While some of these trackers can be expensive (like $100-$130), there are also a lot of free phone apps that will actually track your steps for you. Most androids come with that feature already built in. This feature is not as accurate as the more expensive wrist bands, but it will save you some money while also showing you how much you ACTUALLY are walking each day. If you’re like me and have a desk job, then that’s not much. On average you should be walking at least 10,000 steps a day!
Mix up your routine. If your fitness routine doesn’t bore you, then you are more likely to stick with it. Do interval training one day, yoga another, give pole fitness a try. We’re all not made of money, always check Groupon for fitness classes around you! Get involved and find your calling, mine just so happened to be found in my own living room!
Focus on how good you will feel after your workout, rather than skipping it. Some days you just don’t feel like working out, we’ve all been there. I’ve had plenty of times where I’m exhausted after work and just want to relax and cuddle up on the couch with a jar of Nutella (counter-productive). Think of how awesome and awake you will feel post workout, embrace the endorphin high and you’re one step closer to your fitness goals.
Don’t wait for a special occasion to get in shape. This method of thinking is unrealistic and will only disappoint in the long run. Not only will this effect your moods, but it will kill your self-esteem trying to reach a goal in such a short amount of time. Fitness is a lifestyle, not an exercise in vanity.
Eat! Real food. Don’t try to restrict your diet right off the bat, you will automatically lose the motivation to continue right there. If you love pasta (like I do) then eat it! Of course you don’t want to over-indulge, eat within moderation. If you swear off of all of the foods you love, you will only be miserable and binge at a later time and then feel awful, only to repeat the cycle over and over again. Keep everything you LOVE in moderation! Don’t swear off of it!
Exercise when you’re sore. If you’re just getting into working out, of course you will be sore afterwards! You need to continue pushing through to start the recovery process for your muscles. Sitting on your ass isn’t going to help with your recovery process, you need to keep going and stay ACTIVE in order to build and tone. Keep protein on hand to assist with this process, such as Whey protein.
Get sleep. The more you workout the more you will want a good night’s sleep. It might seem like an impossible task to add working out into your already busy schedule, but it’s not. The things you can accomplish post workout are amazing, and consistently moving up until your bed time will only assist with sleeping through the night.
Focus on how you feel instead of how you want to look. This is a very hard task to accomplish to stay motivated, but it helps to keep you encouraged to push forward. Working out leads to increased energy and a positive attitude all around. Focus on that good feeling rather than looking good and you’ll see results quickly.
Remember that the main goal isn’t to run a 5k every day, it’s just to do something. Even if you aren’t feeling up for the gym today or popping in a workout video, the goal is to stay active and at least do 5 – 10 minutes of something! Whether it be a quick set of jumping jacks, squats, chair holds, what-have-you, chances are that once you start you will be much more inclined to go longer.
So get out there or stay in, either way just stay positive and keep pushing. Your motivation comes from within and through healthy habits that better influence your everyday life. Once you start implementing these into your life, you will see drastic changes into the quality of your lifestyle.
Foodie Friday!! Another one we’re bringing out this week! It still stands true that I have a bit of an obsession with pastas…which unfortunately are not in my weekly meals right now…well I guess I’ll just salivate and hope for this recipe to come back into my life!!
This week I had some extra chicken to make a sort of “cheat” meal and took a minor detour from my otherwise healthy meal planning. It’s REALLY hard not to have noodles for me. I have a slight addiction to pastas, you would think I’m Italian, but in reality I am not. But anyways I’ve been wanting to try this recipe for a while now and am so glad I finally got to! Even though the bowl I made for myself completely filled me up before I even finished it, which I guess isn’t a bad thing, I had to force myself not to finish it up *sigh for moderation*
Of course I have the habit of not completely reading the directions through and always end up modifying the recipe in some shape or form, but this still turned out amazingly and makes it even better when you already have all the ingredients on hand. Those happen to be my FAVORITE kinds of recipes.
What You’ll Need:
1 lb of pasta (I used penne pasta)
6 strips of bacon, diced
2 tbsp all-purpose flour
1 packet of ranch seasoning mix
2 cups milk
1 tbsp butter
Salt and pepper to taste
2 boneless skinless chicken breasts (cut into pieces)
1 cup shredded cheddar cheese
Directions:
Start by dicing your bacon strips, you can also start cooking the pasta during this time.
I kept the pasta at low heat so I wouldn’t have to mess with it too often while taking care of everything else, and it’s much harder to dice bacon than it seems.
Once your bacon is diced, start cooking in a skillet, also start on dicing up your chicken breasts; once cooked thoroughly drain the grease, leaving 1 tbsp of drippings in the pan.
To make it easier on myself I tilted the skillet at an angle and filled a tbsp full and drained the rest, then poured the tbsp back into the pan. No burns!
Add your diced chicken breasts to the skillet along with the 1 tbsp of butter; cook thoroughly.
After the chicken is completely cooked through, add the ranch seasoning mix, flour and milk over the chicken. Stir until the mixture becomes bubbly and thick.
The original recipe didn’t specify that the bacon was supposed to be pulled out of the skillet so I left the bacon pieces in the skillet throughout all of these additions and it still turned out fine!
Add the cheese and stir until melted; if you removed the bacon pieces from the skillet go ahead and add half of the lot at this time as well.
Combine the sauce and the noodles together – add salt and pepper to taste.
My skillet was not large enough to combine the two so I just topped off the noodles with the sauce mixture. I should have used my larger skillet as I was left with plain noodles afterwards. I recommend combining so it’s evenly distributed!
Top off the dish with the leftover bacon pieces and dig in!
Again, was not aware the bacon was to be removed, all of my bacon was already in the mixture!
My Thoughts:
This dish was actually better than I thought it would be and much easier to prepare than I previously thought. I wish there was more explanation when it came to the bacon pieces in the original recipe, I would have liked the pieces to not have been so crispy, yet it was still delicious! Definitely will be using my larger skillet the next time I make this dish so I can combine the noodles as well. Having a random serving of plain pasta leftover is just awkward, you don’t really know what to do with them! Thankfully last night I made a meatloaf (will post that recipe as well) and the boys had the extra noodles as part of their side! If not for the dish being so filling in itself I would suggest a nice side salad to go with it, or some asparagus! The serving shown above I didn’t even finish! But I have also been eating much lighter these past few weeks.
I highly recommend trying this recipe out, oh! And in case you can’t find the ranch seasoning mix they are usually on the upper shelves with salad dressings, I only knew what it was because Shane’s mom uses these packets to make chip dips, which are AMAZING btw…..oh how I miss chips. Hope ya’ll enjoy this one! Check out below for some more pasta recipes! Also check out the original recipe >>> here<<<!
I have a rather unhealthy but healthy obsession with hummus as of late, I use it for all of my lunch snacks throughout the day and you would think I get sick of it sooner or later, but if anything my obsession has only grown since finding this gem of a recipe! Of course this was found during a Pinterest binge, but I completely modified this one when it comes to the flavor and the veggies, which I decided to put together to really fit my preferences. This recipe is absolutely AMAZING and only took a total of about 10 minutes of prep time, then 30 minutes to cook! Healthy + Time Savvy = my FAVORITE kinds of recipes!
What You’ll Need:
4 boneless, skinless chicken breasts
2 red peppers, sliced
1 bunch asparagus, chopped
1 cup, Sun-Dried Tomato Hummus
Salt & Pepper (to taste)
1 tbsp. olive oil
1 tbsp lemon juice
1 tsp. garlic
Directions:
Preheat oven to 450 degrees. Prepare one large baking dish with cooking spray.
I used coconut oil spray!
Pat the chicken dry, then season the chicken breasts with pinches of salt and pepper. In a large bowl toss the peppers and asparagus with olive oil until evenly coated. Season with salt, pepper, and a pinch of garlic.
Place all of the veggies on the bottom of the dish in an even layer. Lay the four chicken breasts evenly on top, then cover each chicken breast with the hummus until the entire breast is covered. Squeeze the juice of 1 lemon, or the equivalent of 1 tbsp. lemon juice (if bottled), over the chicken and veggies.
Bake for about 25-30 minutes, until the chicken is cooked through and the veggies are tender. Serve immediately.
I needed to add a carb into our dinner so I chose to go with garlic-herb quinoa as a side to this awesome dish! Sometimes you need to substitute the rice for something else and this sounded like a perfect side to compliment the flavor of the chicken. I also coated both sides of the chicken breast in hummus, which worked out perfectly as it became a sort of sauce to go with the veggies and mix in with the quinoa. I can’t wait to try out this recipe with more hummus flavors!
If I could do anything differently I think I would cook the asparagus and peppers in a separate dish, they turned out a little too soggy for my liking, but still delicious! You can find where I modified this recipe from >>>here<<<. Don’t be afraid to play around with your veggies on this one, it’s all about YOUR preferences! Until next time!
Man am I glad that our wedding is over with! Don’t get me wrong, it was beautiful and all things amazing, but being a DIY bride is some stressful business! Today I’m throwing it back to the invite process for our wedding back in June, giving this gem to all the new DIY brides out there, my little sister being one of them!
When all was said and done I had to keep reminding myself that envelopes for letters usually end up in the trash. Unfortunately that’s the bitter truth to it, but even so I put so much time and effort into making the envelopes for the invites as personalized as possible. I didn’t do it for anyone else but myself, it was a fun project, a bit time consuming but hey, at least I only ended up having a little under 40 to do!
My first calling when it came to writing out the invites was Pinterest, and from the beginning I originally believed I had to do about 85 invites so I was NOT about to be handwriting that many invites! You must be CRAZY. For those of you brides out there that DO have that many to address, I highly suggest this link here. She was able to print directly on her envelopes, a method I also tried but failed at. None of my printers I attempted to use were up for the task apparently, but clearly it is completely doable!
So, instead I finally came to the realization that I would be writing out 85 invites, when THANK ALL THAT IS HOLY, I found out I only had to do 36! Huge sigh of relief! But of course, with DIY comes great responsibility and some major mistakes.
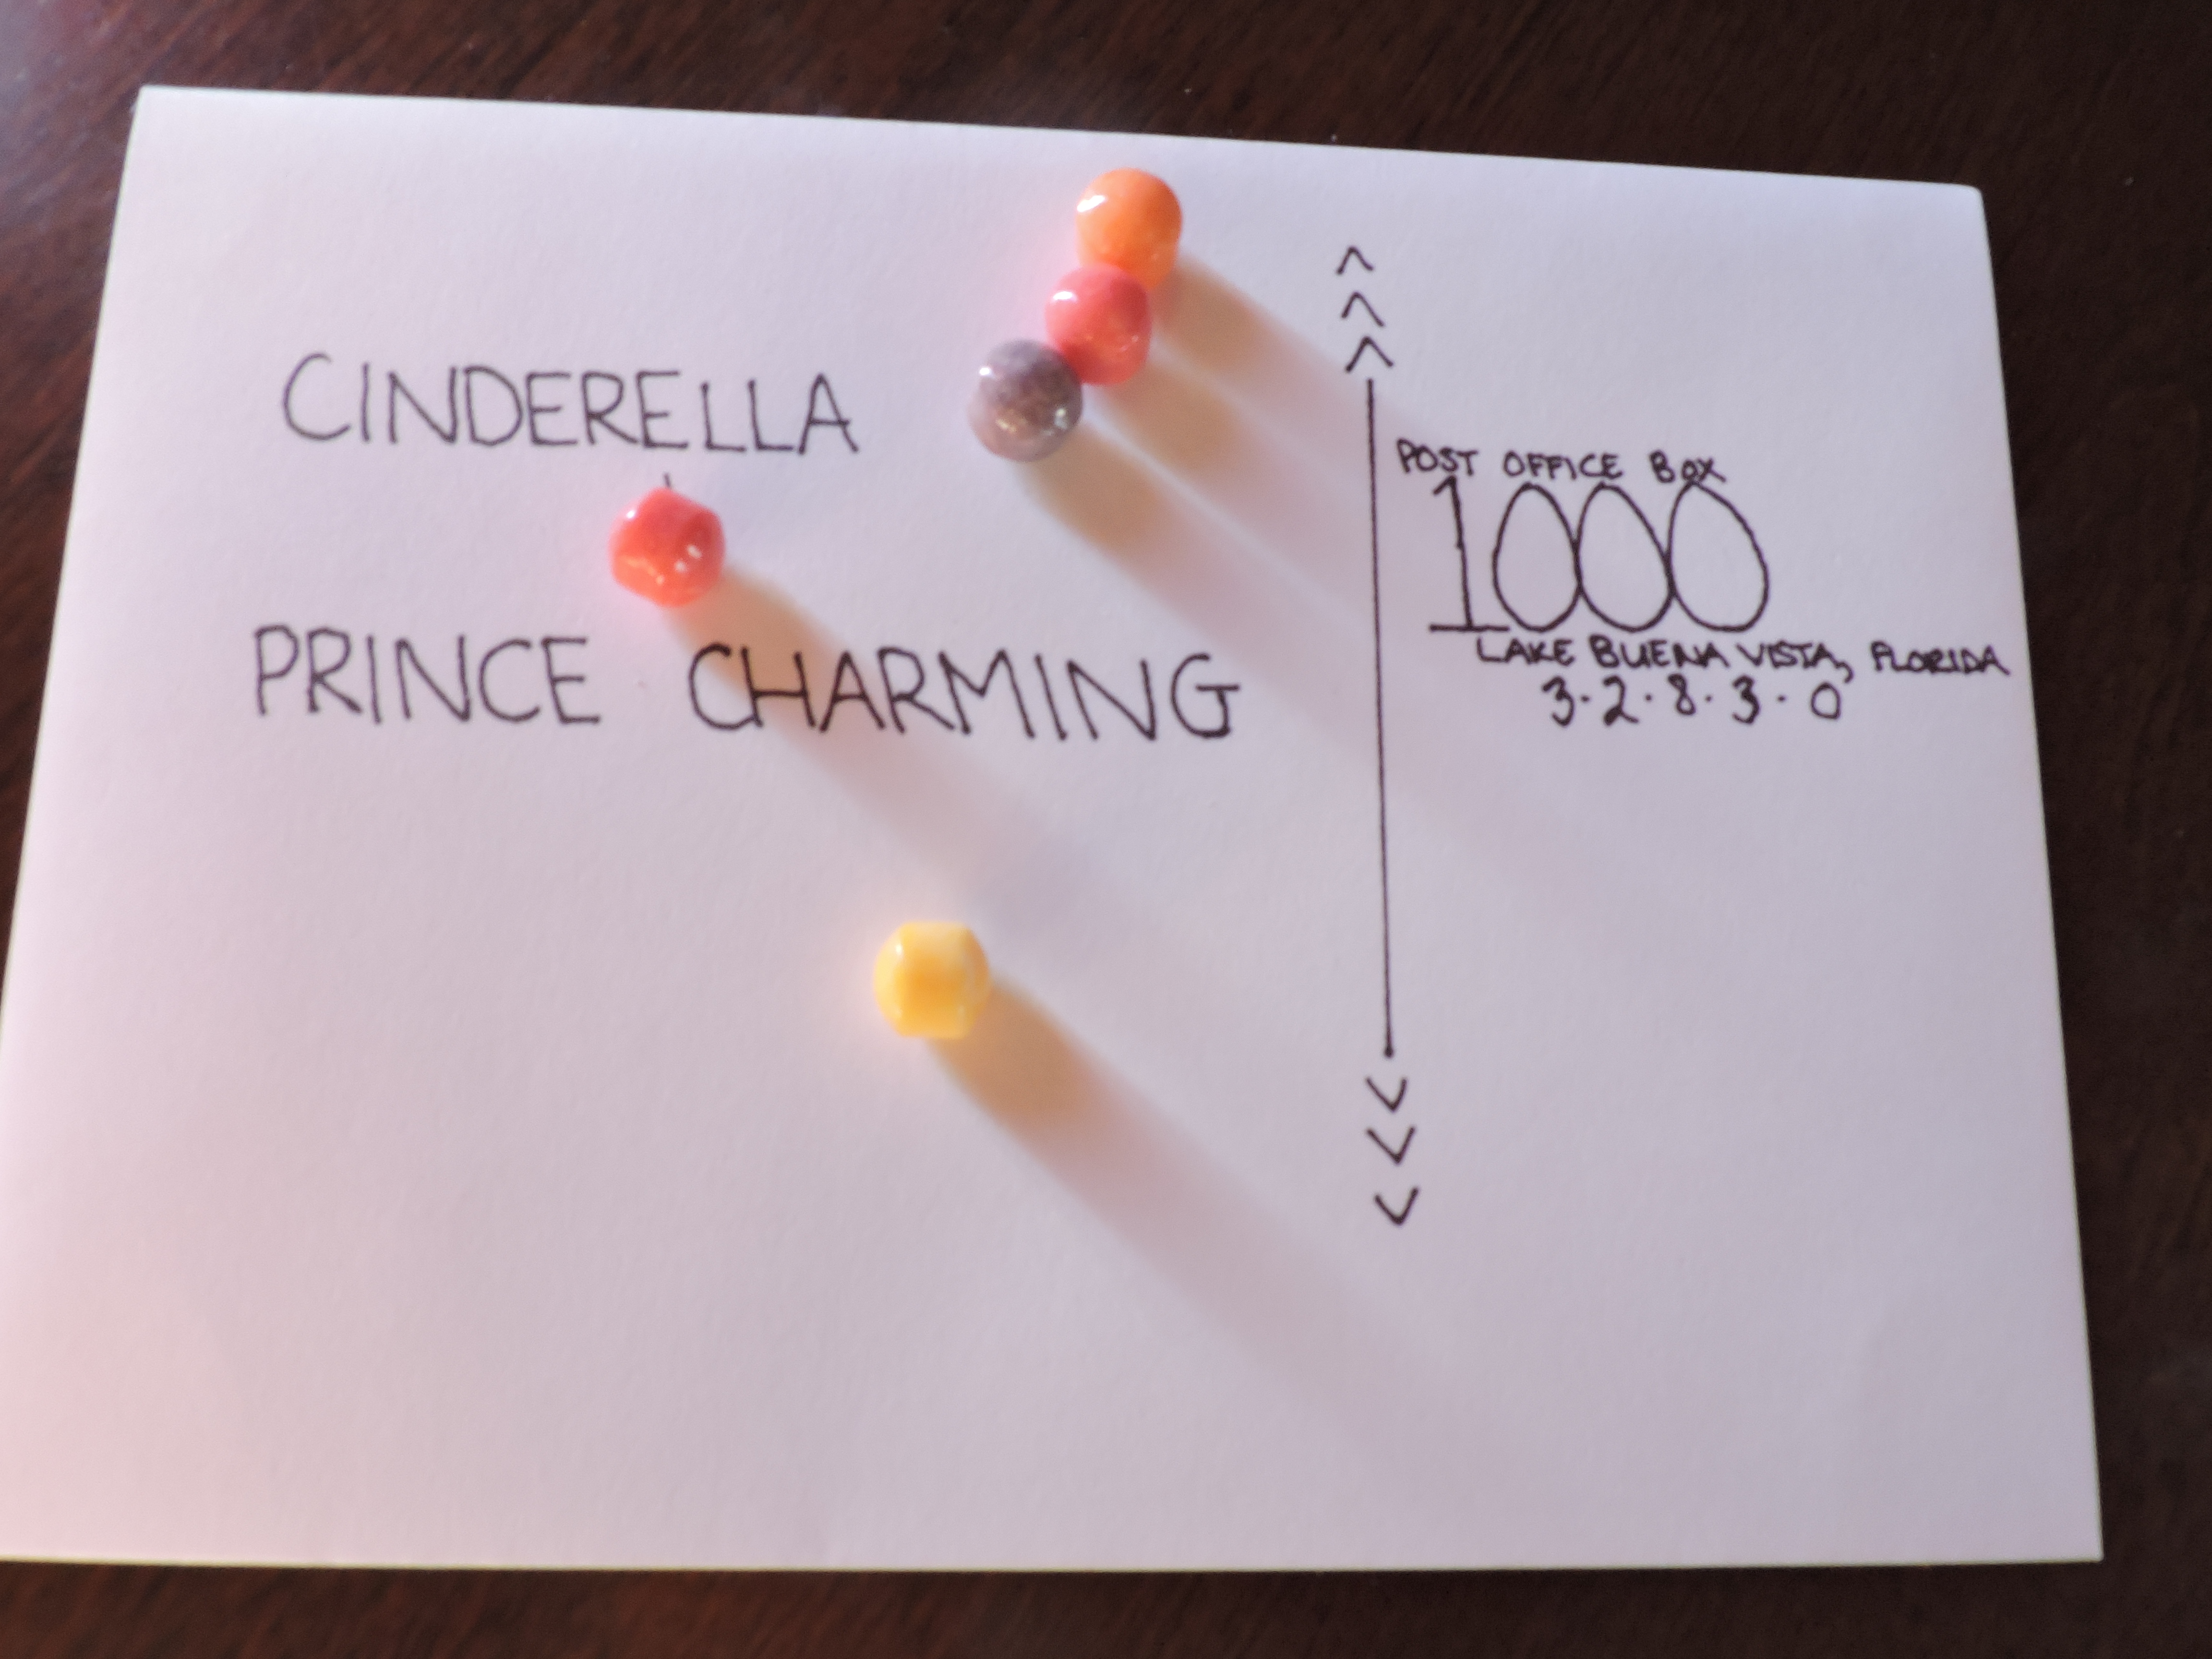
First step was to find out how in the world the proper way to address the invites were, where I came across this lovely and very helpful item on Pinterest. You’re welcome.
Second step, create your rough draft of what you want your envelopes to look like. I modified a few different styles from Pinterest and added my own twist to them. Clearly, calligraphy was out of the question with no printer access to speak of, so I had to rely on my own creative abilities and unsteady handwriting. Of course for any rough draft you do it in pencil, to not do so is just idiocy on your part. Third step, is that once you are satisfied with your rough draft, it’s time to darken this baby up. Now, this is where I should have done more research as to what kinds of thin pens and what-not there were out in the world, before just going on ahead using a fine tip sharpie, which I already had laying around at home. Don’t get me wrong, it came out awesome and I LOVED it. Well, my envelopes were not any fancy colors, they were just plain white. What happens when you put a sharpie onto white paper? Yes, it bleeds through. Now don’t freak out! Yes it bled through, but not to the extent where it went all the way through. Just enough to be completely AWFUL looking on the inside of the envelope, something I was NOT okay with seeing.
Fourth step, RESEARCH. Well now you have to come up with a solution to remedy the awful looking insides of the envelopes, when you come across info on envelope liners. Praise the Lord! But wait, now a Michael’s trip is in order to get the supplies needed for this DIY project. *Sigh* Then on top of that trip, you try and skip a step from the instructions and purchase a pack of already sized liners from Martha Stewart instead of creating your own from scratch…which you end up having to do anyways. This is the first time Martha has ever failed me! I guess her size A7 envelopes are actually different than the ones I had, because her liners DID NOT FIT. Great, that’s what I get for trying to take the easy way out!
These are the little buggers that didn’t fit -_-
So, with my impromptu template that I was planning on using being a complete waste of $3.99, I had to create my own. At least the packaging supplied me with the cardboard I used to make the template.
Materials:
Ruler
Double-sided adhesive tape or glue sticks
Pencil
Cardboard / chipboard / heavyweight cardstock
Whatever paper you want to line your envelopes with
Xacto knife
Cutting mat/board to protect your table
Envelopes
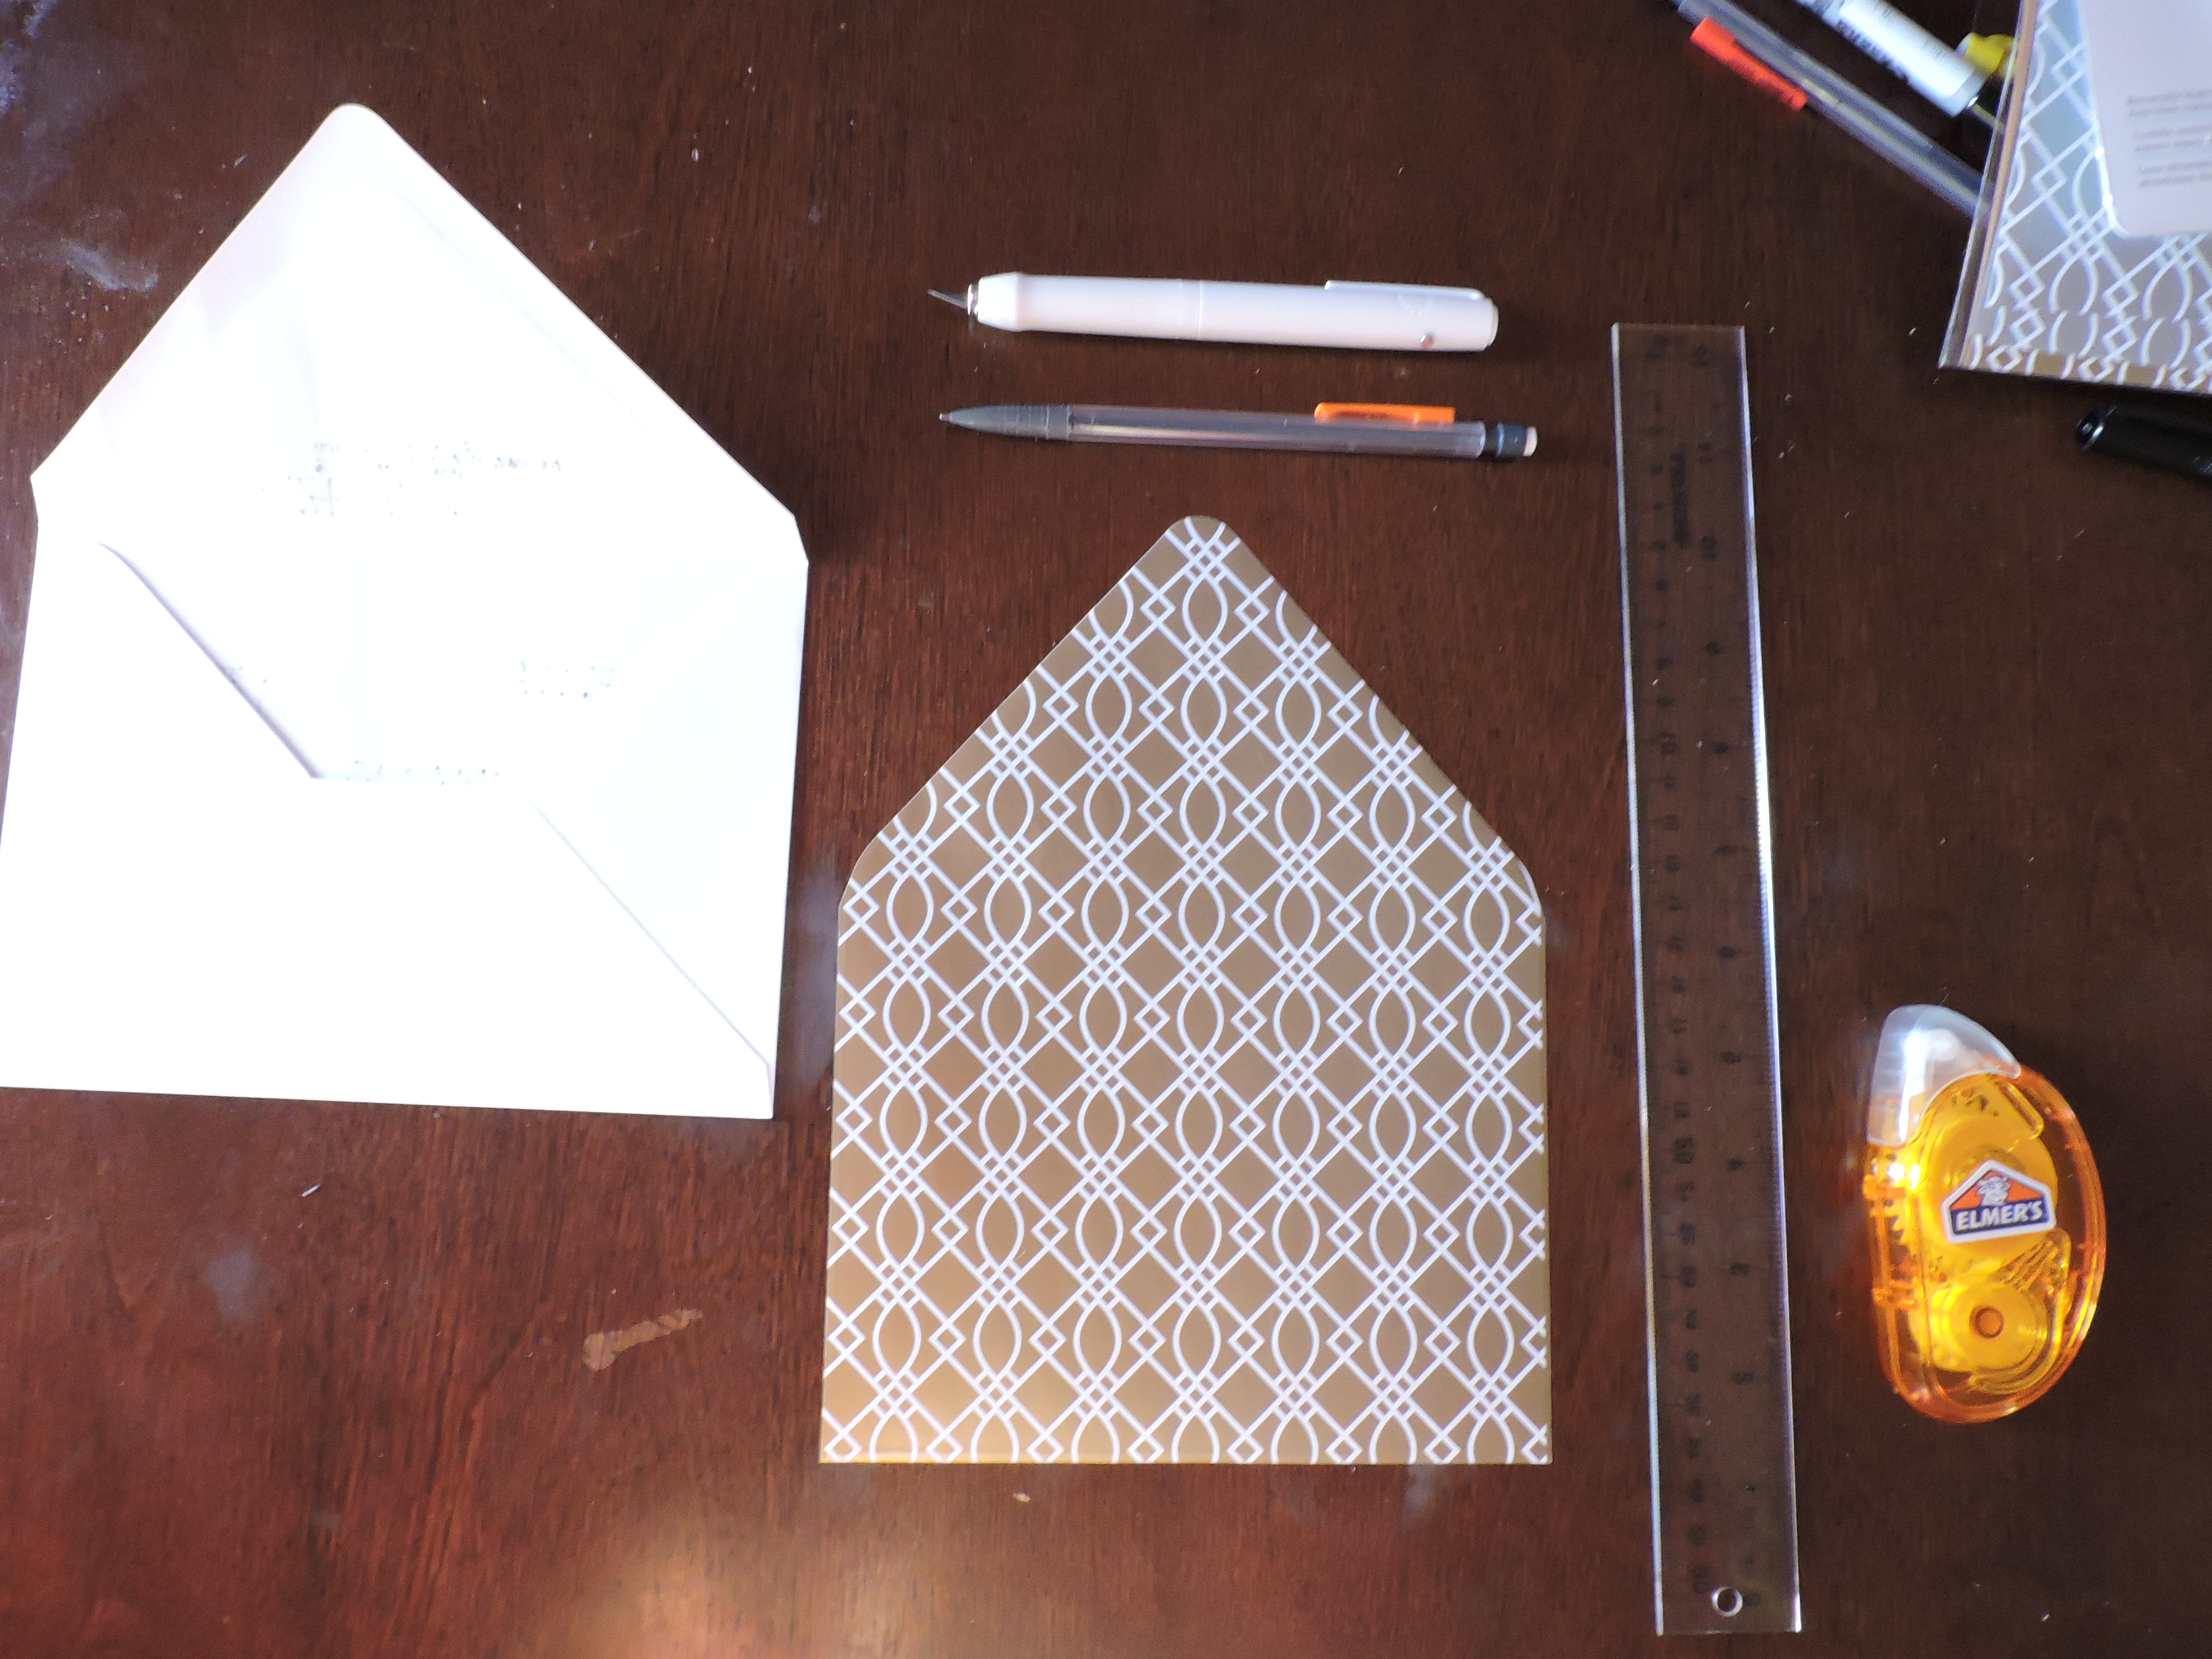
Directions:
Take one of your envelopes and trace it onto the cardboard / chipboard / cardstock.
As you can see, I actually traced mine on the actual paper first. It was much easier to cut through concisely, I then transferred these final measurements to the cardboard, instead of trimming down the edges on the cardboard first.
After I did all of the trimming off the paper and tested slipping it into the envelope, I then transferred the final measurements to the cardboard template.
Cut your template from the cardboard.
Cut 3/4 inch off of the bottom of your template, and 1/8 inch from each side. These trimmings allow the liner to slip easily into the envelopes.
Trace the template onto your envelope liner papers, making sure to do so on the back of the patterned side.
Cut out your liners using the xacto knife.
Next, you can insert the liners into your envelopes.
Use your tape runner/glue stick to secure the liner to the flap.
A trick I figured out, is to fold the envelope over at the flap with the liner in it. The crease will help out immensely when it comes to securing tape to the flap
And ta-da!! You now have beautifully lined envelopes!!
I purchased 4 different styles for the liners, as Michael’s did not have enough of each to do them all the same. The best part though is that on each sheet you can use up the scraps to make liners for the RSVP card envelopes as well, which I also did! Using the same method as above will give you the same results when it comes to the 4bar sized RSVP envelopes!
These liners definitely brought some new life to my invites, I may start doing this with all my cards! On average it took me the weekend to complete this project, but mind you that was also writing out all the addresses as well!
Don’t forget to have a snack! I would suggest wine, but for the sake of not spilling DO NOT have wine!
You can find the original tutorial I used here! Oh and ignore the picture qualities, we’re still trying to improve our photography skills over here!
Happy DIYing!
FYI: I purchased our invites from weddingpaperdivas.com , there prices are SUPER affordable and it was fun to play around with the design templates and make them your own! I highly recommend new brides to get on their mailing list! I still receive coupons from them, which I’ll definitely need for the “thank you” cards that I still have YET to send out…I better get on that!

 So this has to be the most flavorful recipe for pork chops that I have ever encountered! Not only do they manage to be stock full of flavor, but this recipe still allows for the pork to come out juicy and not all dried out. Since I am trying to bring different recipes into the home as of late, I decided to drift from chicken for a little bit and try my hand at some pork chops! Granted we had planned to grill them at first, but come to find out the grills downstairs are all busted and not in working order! But hey, at least it allowed me to get creative and come up with a solution!


