Trying to Maintain Balance

Balance is hard. Blogging was everything to me, I enjoy writing and sharing my story, I love DIY projects, I love ranting and venting without caring really what the comments or feedback was, because at least it was my outlet. Helping people has always been a passion of mine, but wait….so is DIY, so is fitness, so is health, so is family, so are my dogs. We all have countless passions I have come to realize, and for a long time I was trying to maintain a sense of order within my blog…

But order is not what my life is about. My life is messy at times, but it’s fulfilling. I have taken on new endeavors that keep me busy, but I no longer use that as an excuse. You make time for the things you are passionate about. Plain and simple.

Goals change, ideas, and you gain a sense of who you are, even though it takes years to develop into the person you want to eventually become. You work so hard to become successful, to just pay bills, to survive. You try to maintain that balance but don’t really know why you aren’t taking more risks.

Risks are unsafe. They cause discord and mayhem, they cause unorganized thoughts and impulsive decisions. But risks are my life, I took a risk when I decided to add 2 more jobs into my life, I took a risk when I moved states away from my family, I took a risk when I decided to embrace the mayhem and discord in my thoughts, instead of pushing them aside.

No one wants to relate to someone who acts like they have their life together, because the truth is that no one really does. No one wants to reach out to someone who idealizes perfection, because no one is perfect. That’s too much pressure to try and act that part.

We don’t want perfection, some strive for that balance. But the truth is that success doesn’t follow a straight line, it’s a wild and curvy path that only our actions can help to lead. Instead of thinking and dreaming, I’ve decided not to maintain balance, no longer to dream it, but to do it. Dreams are goals that we wish to bring into fruition, and I intend to do just that.


The Truth Behind A Poor Self Image

Did you know that over 65% of people in the world suffer from B.D.D, or for those unfamiliar with the acronym, Body Dysmorphic Disorder? It’s more common that people would believe, and I can honestly say that I have suffered with this view of myself for years.

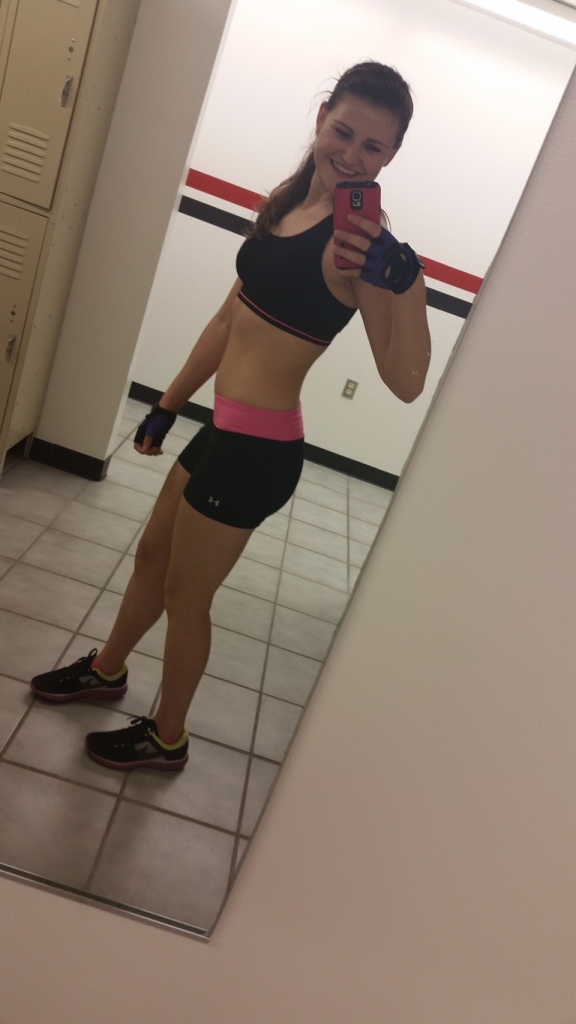
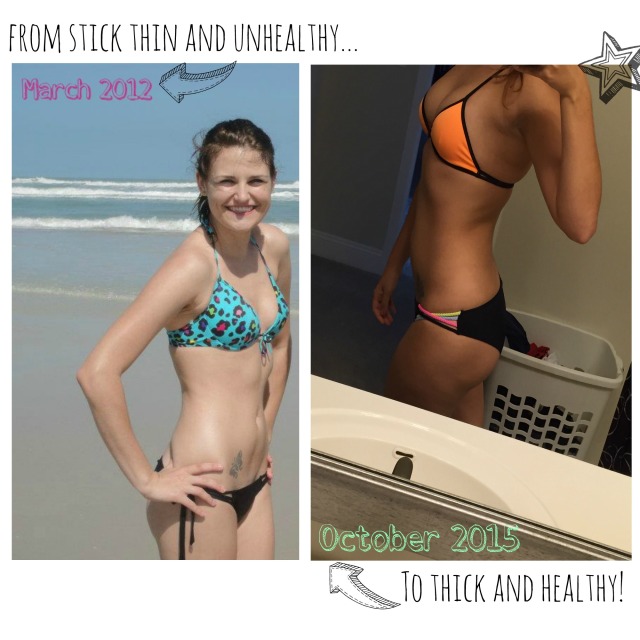
Today I’m going to be really honest with you, because I don’t see myself the way other’s see me and that’s okay, I have learned how to handle this feeling and live with it. But to get to the point where I am at today, which is happy and proud of my body, it took a lot of work through personal development and exercise. I say exercise because I used to be the term “skinny-fat,” which essentially means that I was not healthy in a sense, but I was not technically “fat” either. I felt that any form of exercise would only make me look “manly” and if I ever did tag along with other’s who had a gym membership I would do maybe 20 minutes of cardio and some ab exercises then call it a day.

I refused to eat, I thought that if I ate too much then I would “get fat,” when the reality of it was I was eating unhealthily and very sporadically. Fast foods or frozen foods were all I ever ate when I did eat, maybe twice a day if that. On top of that I drank excessively, and since I hated/hate beer, it was always frilly girl drinks packed full of sugars. I was the epitome of unhealthy and because of these habits I also ruined my immune system, I was sick constantly with either a cold or the flu and developed some withstanding problems with certain foods to this day because of what I denied my body for so long.

What I saw in the mirror, was what I thought was attractive and pleasing for other’s to see, but I still saw a girl who was “fat” and completely unhappy, not to mention uncomfortable in her body. I saw excess fat where other’s could not, I saw pudge that no one else was aware of, in the mirror I viewed imperfections where there were none. There is no way to really identify where the stem of this view of myself came from, I don’t honestly believe that science can explain this one, but they will try to anyways.

Growing up I went through a “chubby” phase as most growing children tend to do, but I was ridiculed for it, made fun of constantly and developed a low self-esteem because of that. But I never lost my ambition, I continued with outdoor activities, sports, anything that I could do so I could “lose weight” and “get thin.” These were my thoughts and actions just at 10 years old….where I should be doing these activities just to have fun, which I often did still have fun, but my underlying thoughts were that participating in all of these activities would “make me skinny” and therefore more liked and accepted by my peers.

I grew continuously through middle school, still holding onto some baby weight, getting made fun of now for my quirky personality along with the “chubby” baby weight still holding onto my body like some kind of disease. I went through the skater phase, the emo phase, the preppy phase, all of those awful stages that come with trying to find out exactly who you are that all pre-teens go through, while hiding my personality from everyone and being someone completely different to just “fit in.” I was so excited when I finally got braces in eighth grade, surely they would make me more beautiful and confident, then I could truly be accepted…just 1.5 years until they were off! (try 3 years)

Deciding on which High School to go to was an easy choice for me, I needed a fresh start where people wouldn’t know who I was. Tired of being picked on by the same people everyday, I went to a school where no one would even know who I was or what I looked like previously, this was my chance to start over and I took that chance. I took Personal Fitness the summer entering High School, to prematurely make some friends and earn some credits and I started my freshmen year thin, FINALLY.

But with that, came the pressure of staying at my ideal vision of thin. By the time I got into my first year of college, it only got worse and I only became more and more unhealthy. I skipped meals on a daily basis thinking that this was the right way to stay thin, which of course I now understand that the right foods provide you with the nutrients you need to fight off illnesses and support your immune system.

March 2012

I was unintentionally letting my body down, not only physically but mentally. I was unstable and in a terrible emotional state, constantly making excuses as to why I was always angry or upset with everyone around me, but the truth is I was starving myself. I starved myself of food, healthy relationships, personal happiness, and started spiraling into someone I hated. I let my self loathing take over my life and fell into turmoil, I was no longer myself and honestly didn’t even know if I ever was to begin with.

I lost sight of who I was for a long time, but I decided finally that this needed to end, that I needed to change. Once I made the decision, I put it to action. Through personal development and a healthy relationship I was able to turn my life around, I was able to start being the person that I had always wanted to be, but couldn’t let myself become before. I’ve continued to change over the course of four years now, to constantly be myself no matter what, to embrace who I am and not try to be someone else’s idea of perfect. To become a more confident and beautiful version of myself, to eat….and eat A LOT! But also to LIVE. To be happy within myself and extend that warmth on to others.

IMG_0101

Through this learning process I have discovered that we are who we choose to be, and I chose to be what no one else – including past me – would ever believe I could become: completely happy being myself and loving the skin I’m in. The struggle was well worth it, and I am proud of who I am today. While I will always still struggle with what I see in the mirror, I know that inside I am the most beautiful that I have ever been, and that’s the part that shines through any mirror around. This journey made me strong, and I will only get stronger with time.

Transformation

If I can overcome my insecurities and see a better version of myself in the mirror, and finally feel complete and comfortable within myself, then I know it is possible for other people out there who suffer from B.D.D., together we can overcome this image. We can become healthy, both in body and mind.

Signature 3


7 Days of Clean Eating

7 Day Free Clean Eating Photo
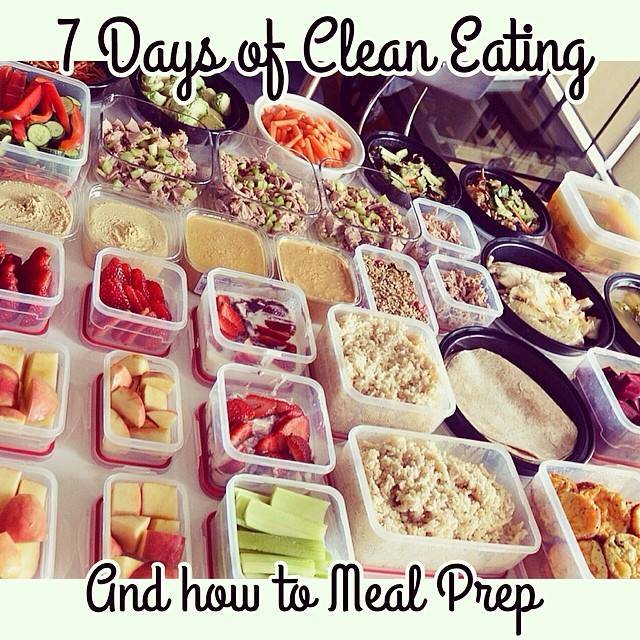
I have been busting my hump so far with this 7 Days of Clean Eating Challenge that I have going on! Since it’s a completely FREE group I figured I would extend the invitation out to any bloggers out there who are looking to jump start their health & fitness journey’s!! Like I said a few weeks ago, big things have been happening here at No Limits! With the start of my own fitness coaching business, I have been in non-stop marketing mode when it comes to offering my services!

Here’s a little rundown on what to expect in the Clean Eating Group:

  • 7 Day Meal Plan
  • Grocery Lists
  • Support & Accountability
  • FREE coaching
  • At-home exercises
  • Healthy Recipes
  • Tips on meal prepping

If you are interested in joining us, we are on Day 2 as of today! Follow the link below to register 🙂 I have also put the Facebook group link below, go ahead and add yourself to the group and I will approve the entrance!

Register >>here<< & Facebook group  link >>here<<

Hope to see you in the group!! Let the Pre-Giving Clean Eating Begin!

Signature 3

Halloween Almond Bark

Almond Bark

Okay so I am a bit late for this recipe!! But regardless I know someone will appreciate this recipe next year around Halloween time! I’ve been preparing everything when it comes to my clean eating challenge, which officially begins today!! Trying to keep that organized while also running my fitness challenge group, and preparing for the next one to begin! Needless to say I have been busy, and without a proper planning system, I am getting disorganized very quickly! So, with my hectic life right now, you can understand why I’m a week late in posting this lovely Halloween themed Almond Bark recipe, which in all honesty I never even got to try out myself! Guess that means it was good? 🙂

What You’ll Need:

  • 12-14 Oreo cookies, broken up into large chunks
    • BTW, could not for the life of me find orange and black ones?! What is this blasphemy??
  • 1 cup pretzels, broken into pieces
  • 1 pound almond bark or white chocolate melts
  • 1 1/2 cups candy corn
  • 20-30 candy eyeballs
  • 1-2 tbsp of a variety of Halloween sprinkles

IMG_1454

Directions:

  1. Melt almond bark according to package. I slowly melted mine in a sauce pan over low heat, until it appears smooth and shiny. Make sure to stir frequently to prevent burning.
  2. While melting the bark, cover a large cookie sheet with wax paper or parchment paper. Spread broken cookies, pretzels and about 1 cup of the candy corn onto the prepared cookie sheet.
  3. Drizzle the melted chocolate over the cookie mixture, spreading with spatula to coat evenly.
    1. This part can be tricky, as the mixture items will want to come up with the spatula. I still need to find a little trick to prevent this from happening the next time!
  4. Quickly sprinkle remaining candy corn, candy eyeballs and Halloween sprinkles over the almond bark while it is still wet. Place cookie tray into refrigerator until set and firm, roughly 30 minutes.
  5. Break up into small pieces and enjoy!

IMG_1524

Signature 3

Pumpkin Spice Cake Balls

Pumpkin Spice Cake BallsI am so excited to share this post-Halloween recipe with you today! I’m obsessed with holiday themed treats and decided to try my hand at cake balls! I love the look of cake balls, they are so petite and easy to eat, and before creating this batch I had never even had one before! Yes I know, crazy, they have only been super popular for about three years now..what can I saw I’m a little late.

So basically I searched my favorite site, PINTEREST, of course! I simply put in a search for pumpkin spice cake recipes and stumbled across the cake ball one. It’s been a long time coming to try out a cake ball recipe for me, all of my previous baking experiences lead me to this moment! Granted there were some hiccups along the way due to me not reading the instructions fully..oopsies. But they turned out so amazingly perfect regardless of my ingredients malfunction and are probably the softest dessert I have ever consumed! Definitely going to be some more cake balls in the near future, I think I might put some together for my sister’s bridal shower coming up in December!

IMG_1458

What You’ll Need for the Cake:

  • 1 box spice cake mix
  • 3 eggs
  • 1 – 15 ounce can pumpkin puree (or roughly 2 cups)
  • 1 container cream cheese frosting

What You’ll Need for the Coating:

  • 1 pound vanilla candy coating/almond bark
  • 1-3 tbsp vegetable oil
  • 1 ounce semisweet chocolate chips
  • Sprinkles of your choosing

Directions:

  1. Preheat oven to 350 F. Grease and lightly-flour your cake pan, set aside.
  2. In a medium bowl combine the cake mix, eggs, and pumpkin puree and mix until just combined. Continue to beat for 2 minutes, until light and fluffy. Pour the batter into the prepared cake pan and bake in preheated oven for 25-30 minutes, or until a toothpick inserted in the center comes out clean. Let the cake cool completely.
    1. So I did not use a mixer like the instructions said, I’m perfectly capable at whisking 🙂 and I also did the batter according to the instructions on the back of the cake box and proceeded to add the pumpkin puree as well….this is where I need to pay attention more to instructions!
    2. Because of the additional ingredients and the fact that I did not separate the batter between two cake pans my cake took a bit longer to cook  through completely, roughly 35-40 minutes.
  3. Once your cake has completely cooled, break up the cake into a large bowl, add in the cream cheese frosting (roughly half the container), and using clean hands, smoosh it together until well-mixed. Using damp hands, form the mixture into 1″ balls and place them onto a baking sheet. Once you’ve finished with all the mixture, place the baking sheet in the freezer.
  4. While the cake balls are chilling, melt the candy coating in a saucepan over low heat, until smooth. Add in the vegetable oil, a tablespoon at a time, until the mixture is the thickness of a thin alfredo sauce. Turn off the burner.
    1. Do not try to thin out the coating with milk or water, it will start to look like cottage cheese and not edible whatsoever.
  5. Remove the cake balls from the freezer, working one at a time, gently drop a cake ball into the coating, and spoon more over top until completely covered. Fish out the ball with a spoon, and place it on wax paper to harden. Repeat the process, and don’t worry you will have plenty coating to do all of the balls.
  6. Optional: For decoration you can melt the semisweet chocolate chips in the microwave at 30 second intervals so as not to burn the chocolate. Once melted, spoon into a Ziploc bag, cut off the bottom corner at an angle so as to create a makeshift frosting tip. Drizzle over cake balls and top with sprinkles.

IMG_1462

Cake balls are BEYOND delicious, so moist and literally so versatile, I opted out of doing them on an actual stick this time around, but I know that they are much easier to do with the stick. They will look so much cleaner! I actually cut off the excess candy coating just to make them more appealing when I brought them to the Halloween Party. Oh, and tomorrow I will be posting the recipe for Halloween Bark 🙂 So exciting!! But come Monday it’s back to the daily grind of healthy eating with the start of my 7 Day FREE Clean Eating Challenge!! I’ll post more on that later if any of my avid bloggers out there are wanting to join! Happy Tuesday everyone!

IMG_1463

IMG_1460

Signature 3


One Pan Ranch Pork Chops

Ranch Pork ChopsSo this has to be the most flavorful recipe for pork chops that I have ever encountered! Not only do they manage to be stock full of flavor, but this recipe still allows for the pork to come out juicy and not all dried out. Since I am trying to bring different recipes into the home as of late, I decided to drift from chicken for a little bit and try my hand at some pork chops! Granted we had planned to grill them at first, but come to find out the grills downstairs are all busted and not in working order! But hey, at least it allowed me to get creative and come up with a solution!

What You’ll Need:

  • 4 (8 ounce) pork chops, bone in or out
    • I used bone out!
  • 16 ounces baby red potatoes, halved
  • 16 ounces green beans, trimmed
    • I opted out of the green beans altogether, we’re not much of a bean household
  • 2 tbsp olive oil
  • 1 (1 ounce) package Ranch Seasoning and Salad Dressing Mix
  • 3 cloves garlic, minced
  • Kosher salt and freshly ground black pepper to taste
  • 2 tbsp chopped fresh parsley leaves

IMG_1173

Directions:

  1. Preheat oven to 400 degrees F. Lightly oil baking sheet/dish or coat with nonstick spray.
  2. Place pork chops, potatoes and green beans in a single layer onto the prepared baking sheet. Drizzle with olive oil and sprinkle with Ranch Seasoning and garlic; season with salt and pepper, to taste.
  3. Place into oven and roast until the pork is completely cooked through, if you happen to have a meat thermometer you will want it at 140 degrees F, about 20-22 minutes. Then broil for 2-3 minutes, or until caramelized and slightly charred.
    1. This was my first time broiling anything btw! It was exciting 🙂
  4. Serve immediately, garnish with the parsley, if desired.

IMG_1174

Since I opted out of serving with green beans, because gross, I did a side Caesar Salad instead. The entire meal turned out super delicious and it was just the right amount per serving so that you don’t over indulge! We’re all about portioning over here as of late, well at least I am! I’m not dealing with those pesky leftovers any more! No WAY! Check out the link >>here<< for the original recipe from Damn Delicious! Happy cooking!

IMG_1175

Signature 3


The Top 10 Hacks to Being More Productive In Your Day

Blog Post 10.22.15

I don’t know about you, but there are some days where I just feel like I NEVER get anything accomplished in my day! Other’s I get all jittery and just jump right into my to-do list and feel like I can conquer everything on my list! Well what makes these days so different from one another? How can you be more productive in your every day life? I’ve compile this nifty list to answer these questions!

  1. Evaluate you priorities. This is very important to staying productive, take about 10 minutes or so to list out your to-do list and examine who or what is important to you on that list. Keep your list on hand so you can view it frequently and stay on track, always make sure the big things come FIRST. The amount of time you spend on something should be relative to how important it is in your life. Life is short and every second is precious, don’t waste your time on the little things that don’t matter.
  2. Set a timer or time frames and stick to them. Setting a time frame can be the best way to keep yourself motivated as well as productive. For instance, I know that my workouts take up thirty minutes of my day so I always start them at 3:30 in the afternoon knowing I’ll be finished by 4:00 pm. Plan out your time and stick to it! Limiting your time on seemingly endless tasks like emails and Facebook helps a lot too. When you tell yourself that you only have a set amount a time to accomplish a task, it is a better motivator to get it done and not to procrastinate!
  3. Set concrete goals and write them down. When you sit and actually write out clear and specific goals, it is more beneficial to staying on track to reach those goals in a more timely fashion. Set long-term and short-term goals, then break down those goals into manageable day-to-day tasks. All goals that you set for yourself should also have an end date! I have a chart I utilize with my goals on paper and have them posted in our bedroom, so I am reminded each day of what my ultimate goal is that I am trying to achieve.
  4. Use daily checklists. For some reason I just LOVE the feeling of crossing off an item on my to-do list. A daily to-do list keeps you focused in spite of all of your daily distractions. Do not go overboard with your to-do list though, make sure that you can actually be accountable to complete everything on your daily list. I found a little notepad at Staples that I’ve found to be really useful! Blog Post Photo 10.22.15
  5. Wake up early. This will be everyone’s LEAST favorite item on this hacks list, because I can definitely say  that I was never a morning person! But it’s gotten to the point now where I really physically have no idea how to sleep in! Even on the weekends we still wake up automatically around 7 am, granted sometimes we’ll force ourselves to go back to sleep, but we’re still up and doing something by 8 am. Look at it this way, just consider how much your life could change a year from now if you just wake up thirty minutes earlier? You can use that extra thirty minutes working towards your most important long-term goals. Every study that I have ever read confirms that you are more productive in first thing in the morning, use that peace and quiet to complete your most important tasks and you will never regret missing that extra sleep.
  6. Turn off electronics. This might seem to be an obvious item that goes hand-in-hand with maintaining the ultimate productivity levels. Now, I set a time frame and organize my social media posts to be automatically posted using Hoot Suite so I don’t get distracted trolling through my newsfeed on a daily basis. Some businesses require social media interaction, which is completely FINE! But in order to continue on with your daily list, you need to cut out your distractions. Utilize apps like Hoot Suite and set up your posts as a part of your items on your to-do-list, then once that is set get off your phone! When you’re writing your blog posts, or emails, or papers for school, do NOT play a bunch of Netflix shows in the background. You cannot do your best work when you are accidentally typing out an episode of Archer…trust me, that does NOT make for a good thesis paper when you type out “LAAANNNNNAAAA.” It might make for a good laugh with your professor, but only for five minutes before you fail completely.
  7. Make it interesting/fun. This one might sound weird, but it really works for me when it comes to doing something that I completely dread doing. Laundry for instance is my nemesis, I absolutely LOATHE folding laundry, so to get me through it I’ll try making it into a game. I usually will set a timer for myself to make it a challenge, with each week the time gets shorter and shorter. It absolutely sucks if I go over my time limit since I feel like I’ve lost at my own game. I also use a points system for socks, I’ll match the socks and try to toss them into the drawer. For everyone I make I get a point, and for every one I miss I lose a point. Call me a dork, but hey at least it gets done this way!
  8. Change your mood. Your mood completely reflects the outcome of your day. Some days it’s understandable not to be in the best mood possible, but once you change your attitude your entire day can be turned around! Be optimistic and think highly of yourself and be happy! Your productivity is heightened exponentially when you have the ability to change your outlook. You are more likely to accomplish your goals more quickly, than if you view everything with a negative attitude! I utilize personal development (audio books/YouTube/books) to help me stay positive and stay focused to achieve my goals!
  9. Do not half-ass multiple things, whole ass one thing. Multi-tasking might sound like a good idea, but the reality of it is that it’s not at all. Focus your time and energy on one thing at a time, it makes for a better outcome with what you are working on. When you accomplish one thing from start to finish, you are reaped with a better reward of self-accomplishment and are more inclined to move onto the next item with a better attitude. On top of that, you are less likely to make mistakes when you focus on one thing at a time instead of four. You will be more satisfied completing one item at a time and doing it correctly!
  10. Take a break! You cannot be expected to work productively constantly if you burnout and don’t take a break for yourself just to breathe. Taking a quick 3-5 minute break every 90 minutes or so is sure to help your brain refocus. Stand up, stretch, go get some water, a breath of fresh air. then sit back down and get back into it. Do not force yourself to power through an entire day of work without taking a few minutes to yourself to regroup! You will find that you are much more productive and on task when you sit back down after that break.

So go and make your days more productive! Stay positive and remember to breathe, we all have A LOT to get done in day!

Signature 3

Monster Cookie Dough Dip

This recipe title may seem deceiving, but trust me it is NOT in the least….it’s actual cookie dough..with no egg that you can just devour. Talk about dangerous! This wonderful recipe I found – of course – through Pinterest. Then of course the credit goes to The Girl Who Ate Everything, for introducing me to this delicious delicacy, which in some instances I slightly modified to my own personal liking.

The best part about this dish is that there’s really nothing to it at all, it’s simple, to the point, and really curbs your sweet tooth!

2014-10-30 07.53.00_resized

Ingredients:

  • 1 (8 oz) cream cheese package, softened
  • 1/2 cup butter, slightly softened melted
  • 1 cup creamy crunchy peanut butter
  • 2 cups powdered sugar
  • 3 tbsp brown sugar
  • 1/4 cup all-purpose flour
  • 1 tsp vanilla extract
  • 2 1/2  1 cup rolled oats, old fashioned or quick
  • 2/3 cup M&M’s (add more or less according to preference)
  • 1 cup semi-sweet chocolate chips

Directions:

  1. With a hand mixer or stand mixer, beat the cream cheese, butter, and peanut butter until smooth.
    1. I do not own a mixer of any kind *sigh* so this was all in the wrists for me with a whisk, which is much harder- I would assume- when using crunchy peanut butter. I LOVE crunchy peanut butter though, you can also substitute for almond butter if you are wanting a somewhat healthier alternative. It will still taste AMAZING!
    2. Also, since I do not have a mixer I left the cream cheese out to soften for about 15 minutes and opted to melt the butter so it was easier to mix together by hand.
  2. Next, add in the powdered sugar, brown sugar, flour, and vanilla extract.
  3. Using the paddle attachment on your mixer, or just a wooden spoon (or a spatula in my case), mix in the oats.
    1. Since I used crunchy peanut butter with that added texture already I opted to lower the amount of oats I put into the dip, it really thickens up once added. I do like the thickness more than a smoother dip, this is all about preference here! Plus, you are putting it in the fridge afterwards, it will firm up!
  4. Add the M&M’s and chocolate chips.
  5. Store in the refrigerator until serving.
    1. This is where it gets fun! The dip goes well with almost anything! I, like The Girl Who Ate Everything, opted for a spoonful. But It’s a great dip for graham crackers, salted pretzels, and all kinds of fruits.

My Thoughts:

This dish was just mind-blowingly (I don’t think that’s a word, but I’m making it one) awesome! I am very glad that I switched it up a bit, I have tried it the original way and then modified it more because in all honesty it became too sweet for me. I am very partial to sweets, so I added the salty and sweet to balance it out more to where I could eat it more easily. But even so, I do not think there is a wrong way to make this dish!

All in all it was prepped and cooked within about 15 minutes, I didn’t even have it in the fridge for 5 minutes before I sat eating it out of the container! I definitely plan on adding it to the list for dishes I am making for the upcoming Halloween Party!

*Correction, I now HAVE a hand mixer! Of course now I have two, since it was on the registry but not everyone checked it I guess! Works for me 🙂 *

Signature 3


DIY Burlap Wedding Banner

*Yay for reposts!! Check out the tutorial below that we utilized for our head table at the wedding!!*

Alright ladies and gents! Here it is! So apart from Halloween being Friday, Shane was on base all weekend so I was left at home to my lonesome (sorta, Clay was home too), but I don’t take my time to myself for granted! I have been- for the past two weeks now- just stock piling on the materials to get a few wedding decorations in order and all planned out.

My top items, get the banner done and then the centerpieces underway. Don’t worry, I will post the DIY for the centerpieces as well this week. Also, how I am keeping all of these mini projects organized to equal the big picture in June!

Of course the majority of my ideas stem from Pinterest, my savior. Well this little tutorial I followed came from rusticweddingchic.com , where there are seriously so many DIY I have to put on my restraints before I get sucked into the site. If you are a DIY bride like myself, check it out for inspiration!

Materials:

(And these vary depending on preferences)

  • 15 ft. burlap (Hobby Lobby – $7.99)
    • I chose an already banner sized roll of burlap so as to reuse for wrapping the cutlery and centerpieces (coming soon), plus much easier than a huge roll in my own opinion
  • Acrylic white paint (Hobby Lobby – $4.99)
    • You can choose other colors, depending on your style and preferences, creativity is encouraged!
  • X-ACTO knife
    • I just used a razor blade that I had at home, but for safety and precision go for the X-ACTO knife
  • Scissors
  • Paint brush
    • See notes below
  • Printer and printer paper for letters
  • Twine (12 ft. min)
  • Wax paper

20141101_120728_resized

Directions:

  1. Type up your Mr & Mrs text on Word, choose any font and any sizes you would like, of course making it large enough to encompass enough room on the banner. Print it out.
    1. I cannot for the life of me remember the font I chose, I browsed for at least 40 minutes before deciding on this font. I know it is just a font offered through Word, nothing especially downloaded. I think the size ended up being around 300.
  2. Use your X-ACTO knife to cut out the letters so as to create your stencils.20141029_094638_resized
    1. Shane actually did this for me, he used to do window tinting and has a much steadier hand than I do, plus he used a plain razor blade. It was sweet really, he did it while I was at work!
  3. Next, line up your stencil in the burlap to get a gander at how much space you want on either side of the letters.

    1. This is where the burlap banner roll came in handy, it was already the size I needed, I didn’t need to do any ironing from folds, and just had to then cut with the scissors.
  4. Then, cut your burlap into six squares, just overlapping the squares so as to have the same sizes.

    20141101_125211_resized
    Sorry I’m a little blurry !
  5. Once you have your squares you can now lay your stencil down to paint. 20141101_125852_resized

    1. I was in our kitchen, and of course I did not want paint getting onto our table, so I put wax paper underneath the burlap. I chose wax paper because after each square I could just wipe off the paint and lay down the next piece without wasting a ton of paper in the process.
  6. Paint each letter.20141101_130049_resized
    1. I didn’t use a paint brush, I used a sponge, it is hard to paint burlap without snagging the material. I dabbed instead used the painting sponges, same effect, just less hassle.
  7. Once complete, let air dry for at least 15-20 minutes.20141101_132141_resized
  8. Lastly you will want to run your twine through your banner.
    1. I have not done this step yet as I ran out of twine for the Halloween party, I will post an update once it has been completed!

*On a few side notes, this is a very easy project and literally took me maybe twenty minutes with all the supplies already on hand. It turns out AWESOME and I was skeptical before it had fully dried that you wouldn’t be able to see it but you definitely can!*

You can also find this tutorial as well as many others by clicking the icon below! My first link-up party! Let’s see how it goes!

dream-create-inspire-button-copy

Tip: After cutting the burlap you will notice it begins to unravel, pull some of the strands off the sides so it won’t continue to unravel on it’s own. It gives it a more worn and frayed look anyways. See here for further details! If you get the roll instead of the yards it will eliminate the burlap from unraveling on the top and bottom as it is already sewn! 🙂

Hope you all enjoy! More DIY to come!

Signature 3


Buffalo Chicken Lasagna Rolls

Another throwback recipe!! With the hubby not being able to tolerate spicy foods I haven’t had a chance to make this one a second time around! This one is definitely worth a try for your taste buds, they will go crazy!

I got this recipe through Pinterest, posted by Simply Gloria. Where I also did the recipe step-by-step and she had the most helpful tips, photos and tricks listed with the recipe as well! Before trying out this meal, I had NO clue how to shred chicken, or even that you could boil chicken. MIND BLOWN. On top of that, the sauce for this recipe I have also incorporated it into countless on-the-spot dinners now at home!

2014-10-28 08.29.15_resizedIngredients:

  • 6 8 lasagna pasta, drained and cooked
  • 2 chicken breasts, cooked and shredded
  • 1 cup buffalo sauce, divided
  • 1 (8 oz) cream cheese package, divided
  • 1 cup heavy whipping cream
  • 2 tbsp butter
  • 2 cups mozzarella, shredded

Directions:

  1. Add 6 pieces of lasagna pasta to a large pot of boiling water.
    1. I used 8 pieces. No changes have to be made to the measurements.
  2. Cook pasta for 4-5 minutes. It will finish cooking in the oven.
    1. I had to cook mine for about 7-8, I live in a rental and my oven burners are uneven when cooking.
    2. While the pasta is cooking start on the white cream sauce and chicken. (See Notes below)
  3. Drain pasta in strainer and lay pasta onto paper towels to dry off excess water.
    1. This was trial and error, I cooked the extra pieces for this reason, I had a one lasagna pastas tear upon removal from the water that could not be used to roll. Hence the seven rolls pictured above, not too shabby.
  4.  For the white cream sauce – heat a sauce pan (medium to large) at medium heat, add the butter, 4 oz (or half) of the cream cheese, and the heavy whipping cream. Whisk it all together while it is heating up. Sprinkle in some garlic and onion powder seasoned salt. You can also add salt and pepper to taste. Set aside once it has thickened.
  5.  In a large mixing bowl, combine the shredded chicken, the remaining 4 oz of cream cheese, mozzarella, and buffalo sauce. Stir and set aside.
  6. Put a spoonful of the white cream sauce on each pasta. Next, spread the chicken mixture evenly on top of the sauce. (Be sure not to overload it, otherwise it won’t roll up) Sprinkle with some mozzarella, then roll up.
  7. Have a baking dish off to the side with some white cream sauce on the bottom. Set each lasagna roll onto the sauce.
  8. Pour the remaining cream sauce on the roll-ups. Sprinkle on more mozzarella and drizzle some extra buffalo sauce.
    1. Seriously just drizzle, as you can see above I overloaded mine, and the sauce overpowered the dish. It was still delicious, but it was just too much buffalo sauce.
  9. Preheat the oven to 350 degrees, bake for about 25-30 minutes. Then allow it to rest and cool for about 10 minutes after pulling it out of the oven.

Notes:

How to Shred Chicken Breasts: Put the 2 boneless chicken breasts into a pot of water at about medium heat. (No need to rinse the chicken) Cover with lid and bring to a boil. Once it has come to a boil, remove from heat but leave the lid on and let the chicken continue to cook for roughly 20 minutes. Then, take out the chicken and shred with two forks.

My Thoughts:

This dish was superb, besides the fact that my drizzling techniques need some definite work! I will most certainly be attempting this one again, and since I have been using this same white cream sauce on many dishes, I would add much more to this recipe than what is listed. In my attempt I did not have enough to fill the bottom of the baking dish with leftovers to pour over the top. I also did not have onion powder on hand, so I opted for seasoned salt instead.

You also can take it one step at a time, I cooked all three separate items at once to cut back on time, and also because I prefer multitasking. I also found out that the noodles would not roll up as easily if left sitting for too long, and ended up having to put them back in the pot for a few extra minutes once the chicken was finally ready to be shredded.

Overall, this recipe does take a little over an hour to make, what with prep time then cooking/cooling times. It was a weekend dinner for me when I wasn’t too rushed to complete it. But I would definitely recommend it! Check out more recipes by Simply Gloria!

Signature 3