This little Pinterest project right here is one of the first I ever posted about when it comes to DIY! By no means am I now an expert on DIY projects, but at least I’ve gotten a handle on which projects I will actually keep in the long run! While these coasters were continuously used for about a year and a half after their creation, unfortunately I had to retire them due to my style changes. Which of course I am now in need of coasters YET again! I foresee another DIY coaster project in my near future, but until then I’ll bring this bad boy out and give it the proper #repost that it deserves!
What You’ll Need:
- 4 ceramic tiles (16 cents each) – Home Depot
- Everbilt Felt Bumpers ($4.99 ea.) – Home Depot
- Adirondack Alcohol Ink (3 pack of varying colors for $9.99 ea.) – Michael’s
- Adirondack Alcohol Blending Solution ($7.99) – Michael’s
- Martha Stewart multi-surface black paint ($1.29) – Michael’s
- Random package of paint brushes ($4.99) – Michael’s
- Krylon Clear Glaze sealant ($7.99) – Michael’s
All the supplies after tax totaled about $65, since I also bought two packs of the felt bumpers, as well as two packs of the alcohol ink.

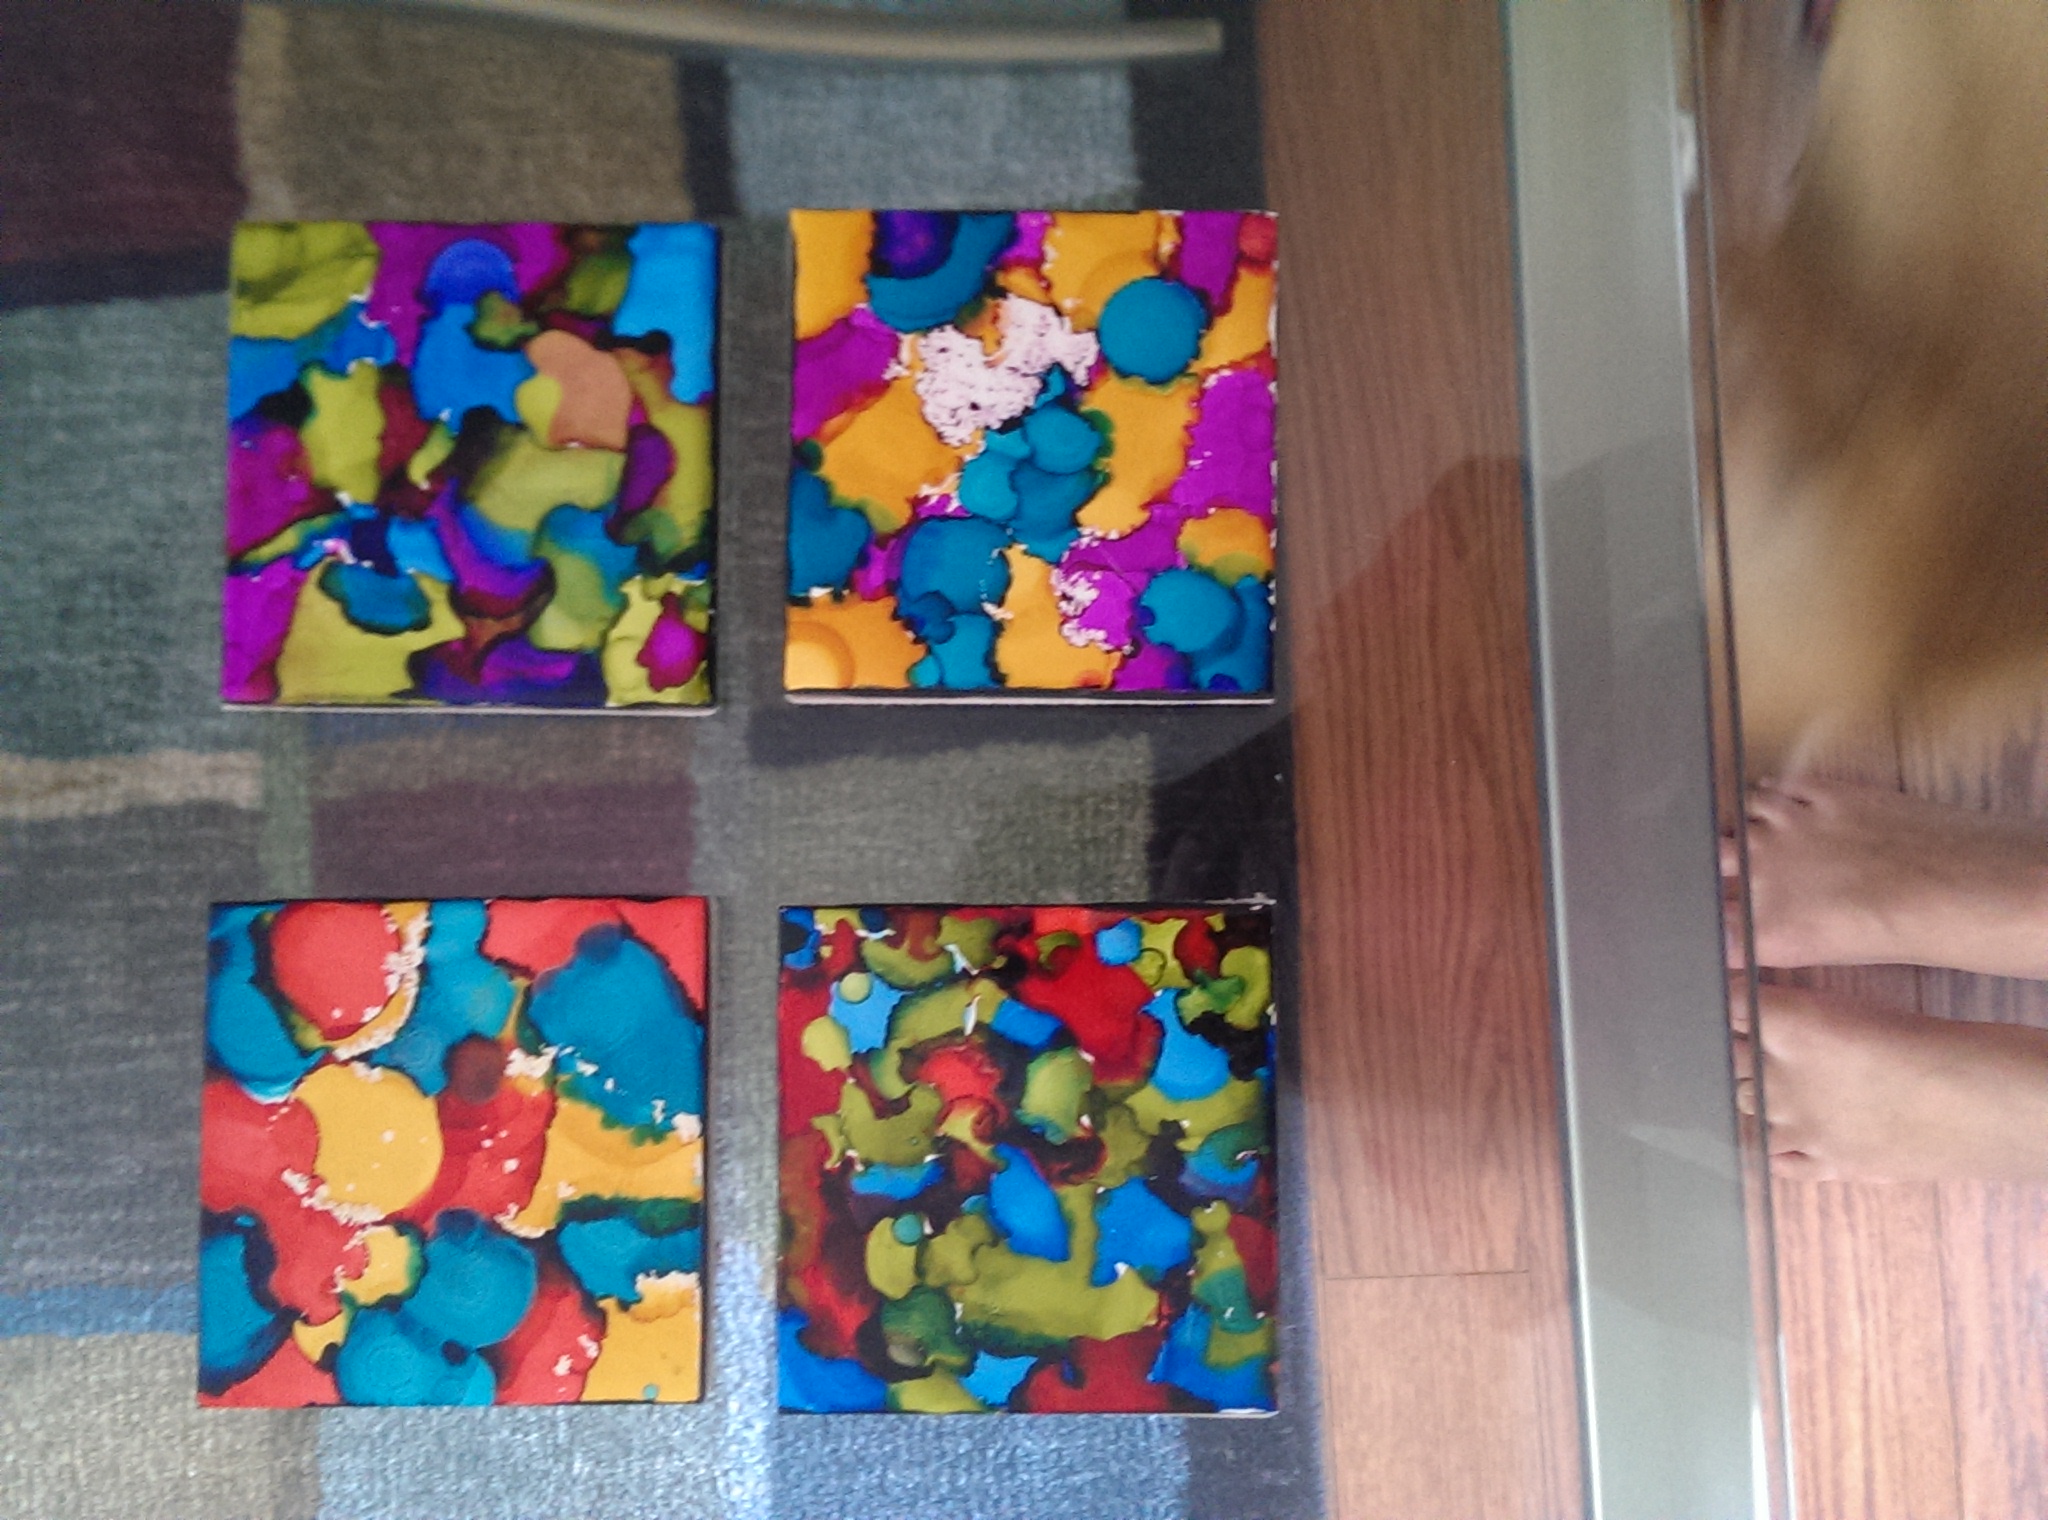
To show you what we are going for here is the completed result:

Step 1:
Make sure to clean the surface of the ceramic tile, I tested this as well to see which had better results, and cleaning the surface beforehand definitely comes out much better than the uncleaned surface. Next, spread the alcohol blending solution all over the surface of the tile using the paint brush. The amount doesn’t matter, just make sure the entire surface is rubbed with it.

Step 2:
Start dropping the ink onto the tile. You do not need to do a lot of drops, you will see the ink begin to morph and move over the tile on its own. If you added too much ink, you can dab it out using a paper towel, in my case I used q-tips, much easier to reach without spreading the ink everywhere. It is very hard to mess this part up, it takes shape all on its own. If you do screw up, add some of the blending solution to the spot and rub clean with the paper towel and it will completely come off. Completely cover the tile with ink droplets.
 Step 3:
After you have completely covered the tiles with ink, wait until dry so as to paint the sides of the tile. I chose black, but any color will suffice for the look you are going for. It takes about 30 minutes for each tile to completely dry. Paint the sides of the tiles and let sit for another fifteen minutes. The Martha Stewart paint I used dried VERY quickly. Which is good for me since I have very limited patience.
 Step 4:
Once everything has completely dried, take the tiles into a well ventilated area and spray over the tiles with the Krylon Clear Glaze, I went over the tiles twice with the spray. After about an hour the tiles will be completely dried and ready for the last part!

Step 5:
Since the back of tiles are very coarse and usually made for concrete/grout I chose an adhesive felt bumper, usually what people use on the bottom of furniture on wood floors so as to not scratch the wood. They match up perfectly to size with the tiles I chose, line up the tiles on the felt and cut accordingly. Peel the back off the felt, and stick onto the back of the tile and wa-la! You now have bright and beautiful coasters!!


RELATED ARTICLES
- DIY Alcohol Ink Coasters (daisyanddaydreams.com)
- Make your own Drink Coasters! (craftyideasblog.wordpress.com)
- DIY Ceramic Coasters (stylemepretty.com)
